Case study
Optimization
Rendering
Intermediate
Optimizing URP lighting for low-end devices
10 min

Imagine this hypothetical scenario:
I have a game that uses mostly two shaders for the whole environment:
one for opaque objects
one for vegetation
Both shaders are created using Unity's Shader Graph in the Universal Render Pipeline.
I want to check how far I can push the rendering performance only by playing with Unity's lighting algorithms.
___
Problem with Unity lighting performance
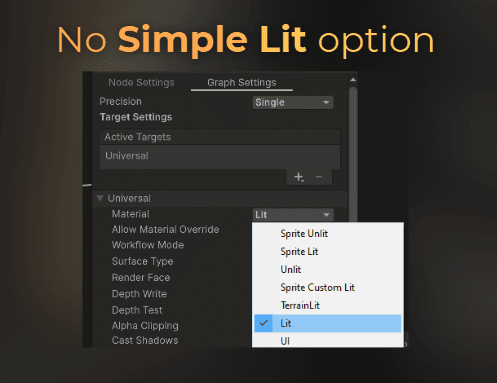
The problem with Unity's Shader Graph in URP is that Unity doesn't support a simple lighting model directly in the graph.
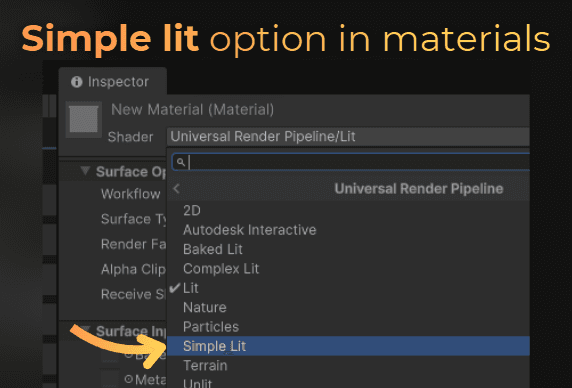
But in the URP shaders, we do have access to a shader with a simpler lighting model.
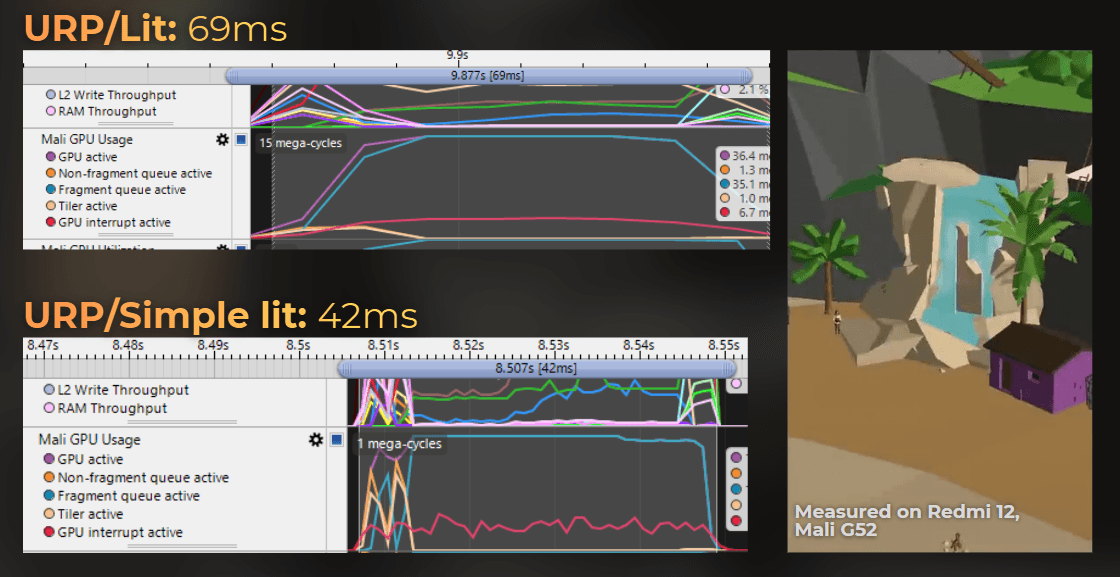
This simpler lighting model (Simple Lit) can render much faster than the PBR lighting. If I compare both of them on a mobile GPU, Simple Lit gives me 39% lower render time:
So when I want to use custom shaders made in Shader Graph, I am forced to use a lighting model that is much slower on low-end platforms.
In this article I show you how I fixed this issue.
___
Benchmarking scenario
I will benchmark the following scenario:
GTX 1050 Ti
DX11
1920x1080
URP, Forward+
Camera angle shown below
All opaque objects use Shader Graph with the Lit master node

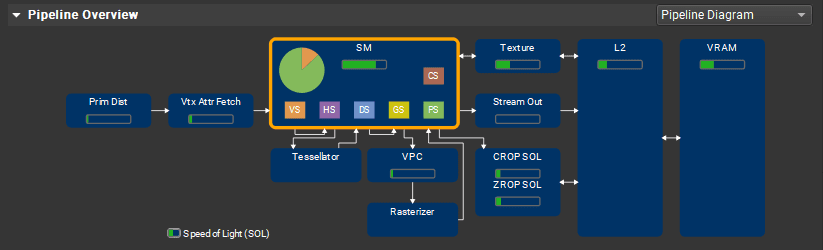
The performance on the GTX 1050 Ti is 9.70 ms per frame on average, where opaque objects take 5.96 ms:

I also ensured that the opaque objects are bottlenecked by the fragment shader performance, so every fragment shader optimization should be visible as shorter render time and increased throughput of other units than SM.
___
Optimization iterations
Replacing the shading model in Shader Graph
I think it would be nice to swap the lighting quality of the game at runtime, so on lower-end GPUs we get lower-quality lighting that performs faster, without swapping shaders or materials on the objects.
I moved the URP package from Library/PackageCache to the Packages folder of my project so I could edit it.
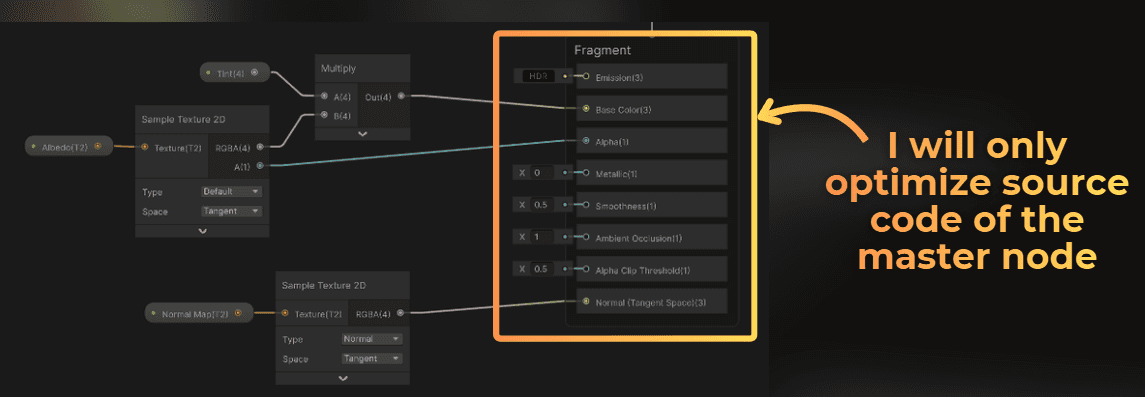
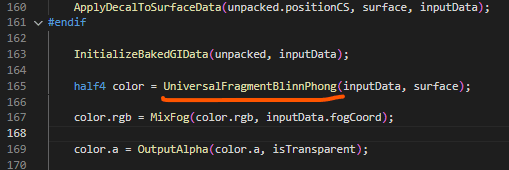
Shader Graph's master node uses the Editor\ShaderGraph\Includes\PBRForwardPass.hlsl file to generate the shader code. This code implements the lighting for the graph in forward shading. Notice that this graph always uses the PBR lighting model:

This UniversalFragmentPBR(...) function implements the whole lighting model, and I found that it is implemented in Lighting.hlsl.
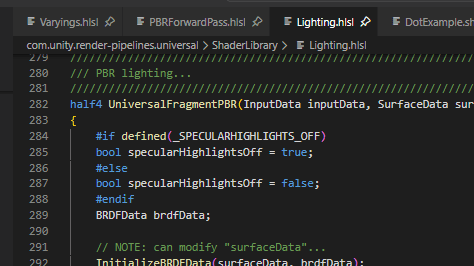
Notice that this is a lighting library that contains a few lighting models. When I scroll down, I can find that there is also Blinn-Phong lighting there, just waiting to be used.
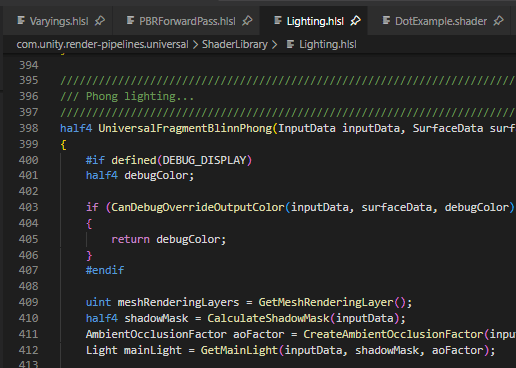
Blinn-Phong shading is one of the first lighting models that supported specular highlights in realtime graphics. It is very robust.
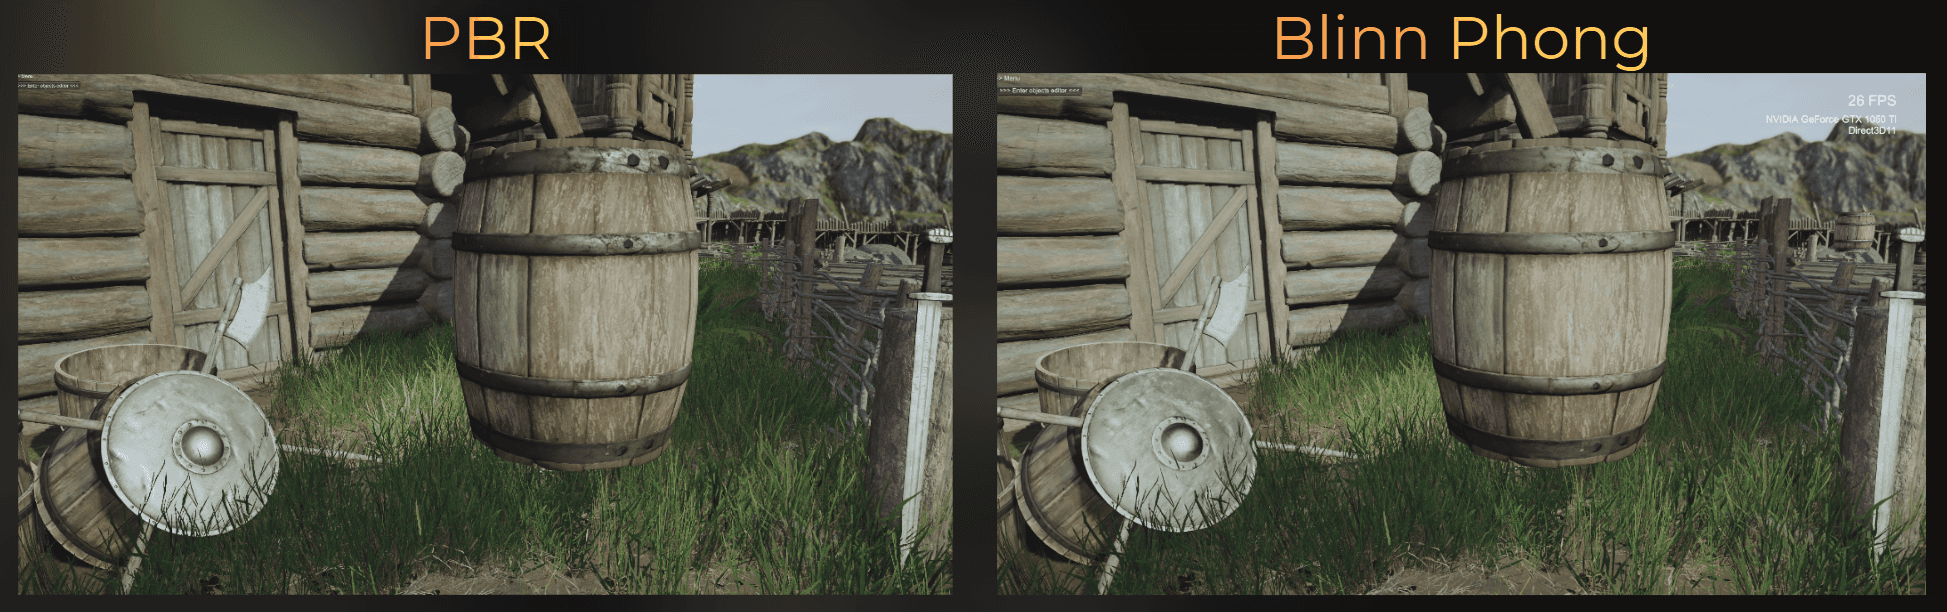
To use this simplified lighting, I can just replace UniversalFragmentPBR with UniversalFragmentBlinnPhong, and in theory it should work, right? Let's do it!
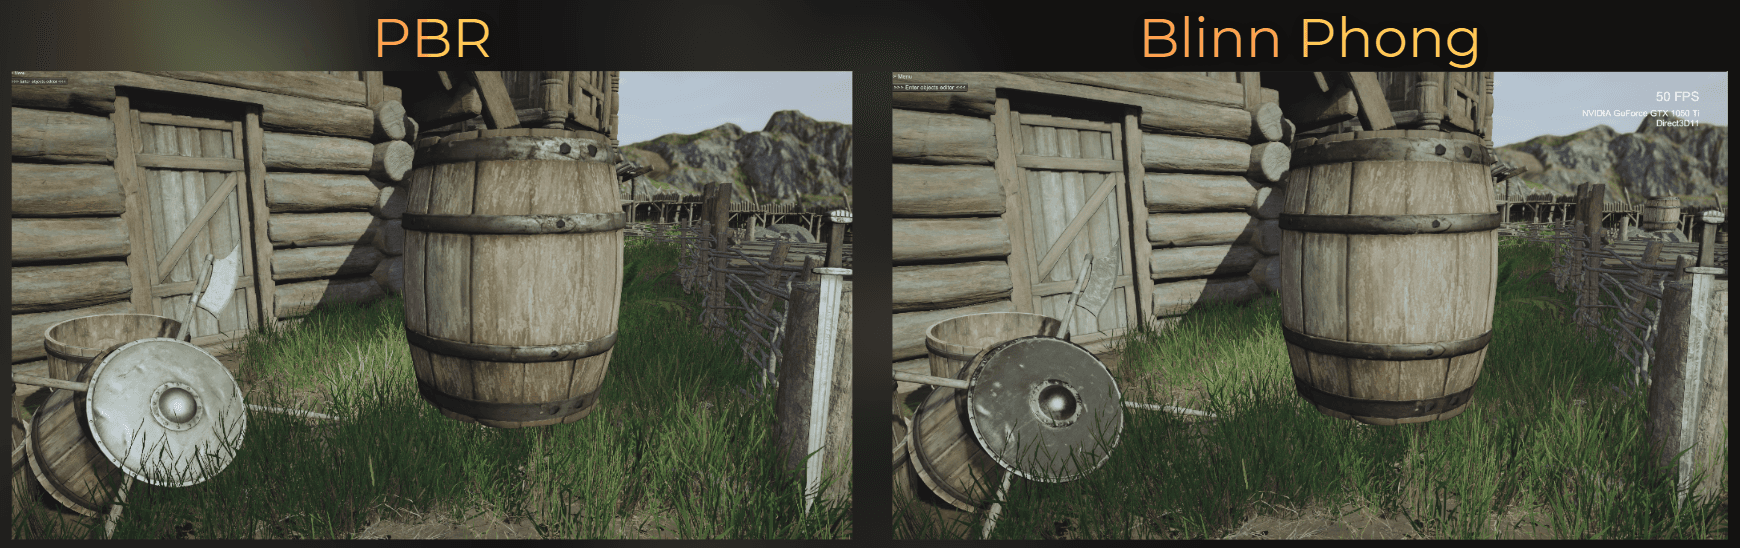
Well...
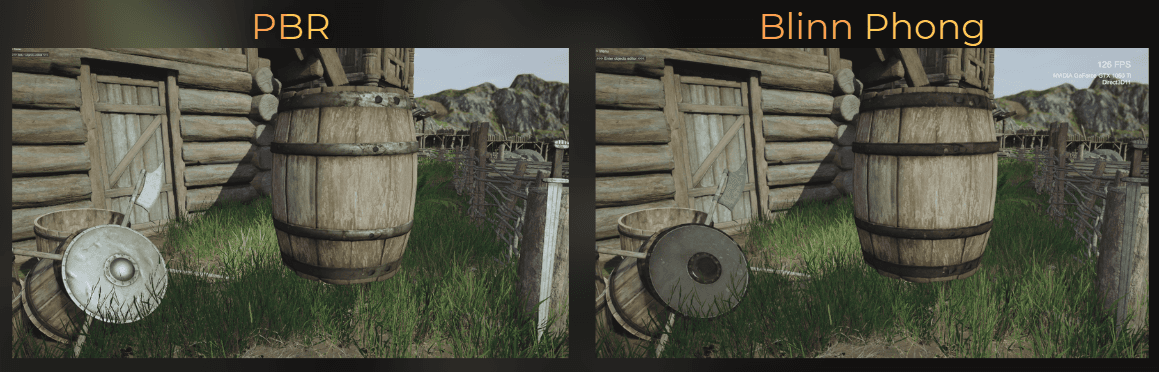
The lighting looks much worse. It looks like I lost all the specular highlights.
___
Fixing specular highlights in Blinn-Phong
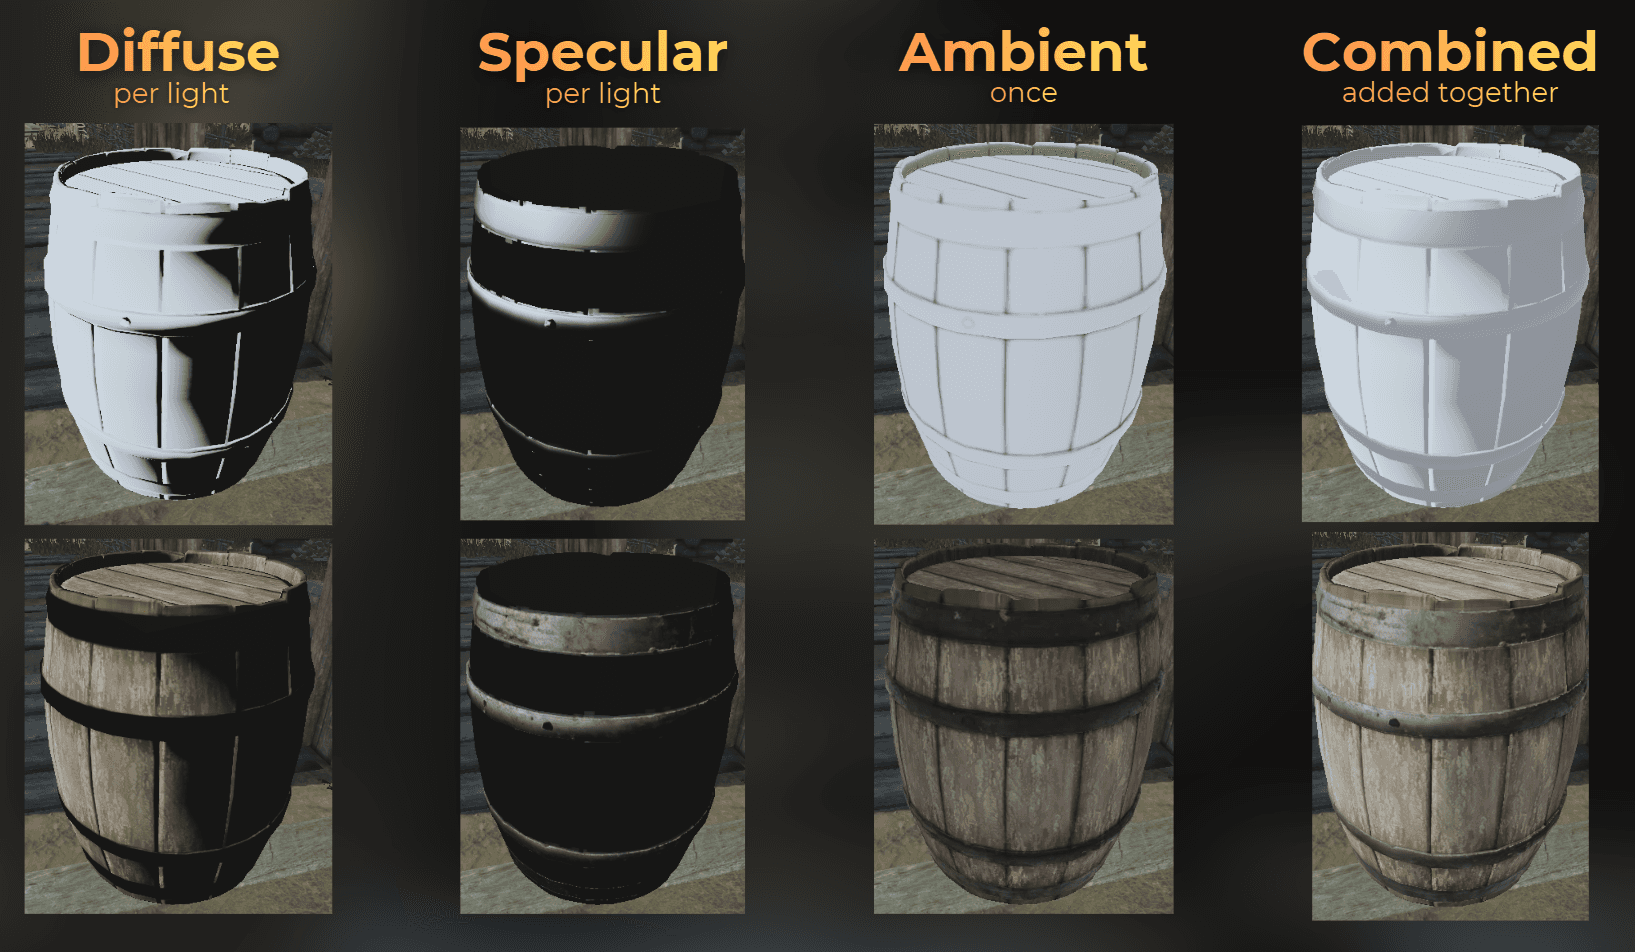
To fix that, it is good to understand how lighting works in realtime games. Lighting is computed in a few steps. For each source light, diffuse lighting and specular lighting are computed.
Then the environment around the object affects how it looks, so ambient lighting is computed separately.
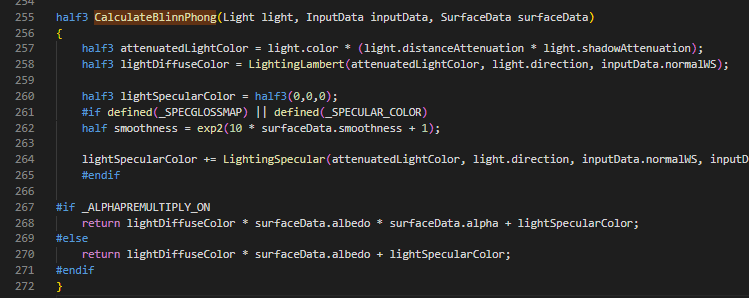
So, to find what is happening with the specular lighting, I need to search where each light is processed. In the source code, all the lights are processed in this loop:
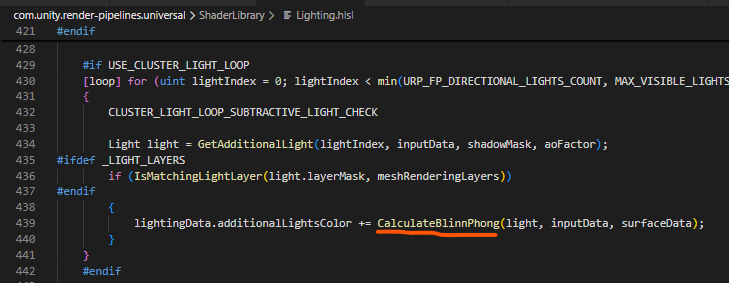
And each light is computed by the CalculateBlinnPhong method. Here it looks like the specular highlights are only computed when the shader was compiled with the _SPECGLOSSMAP keyword. In the code below, the LightingSpecular method is used only if the shader was compiled with that keyword.
So I need to make my shaders use this keyword for compilation. Using #pragma multi_compile _SPECGLOSSMAP in a custom function node will add the specular feature to this shader without increasing the shader variant count. I just need to ensure that it is not stripped out from the shader code, so I connected this node to the base color output of the master node.
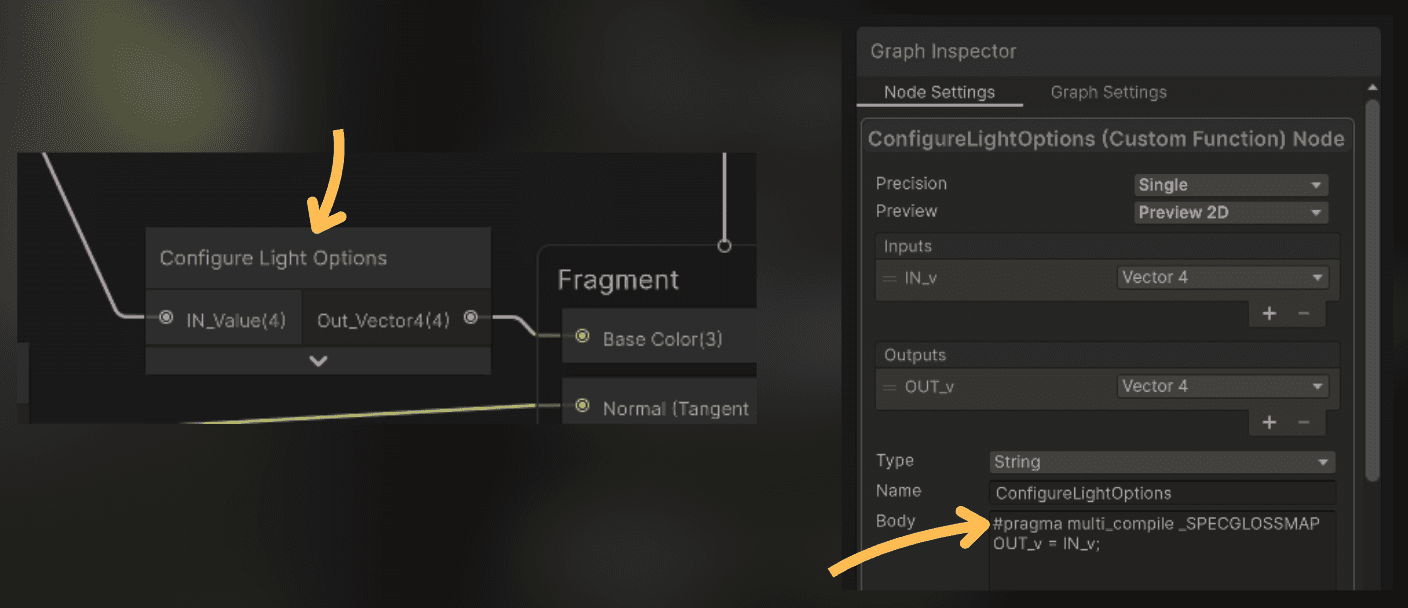
Now the specular highlights are fixed.
___
Tweaking specular highlights
Now I see another issue: metallic objects look very different. It is about the sharpness, or pointiness, of the specular reflection:
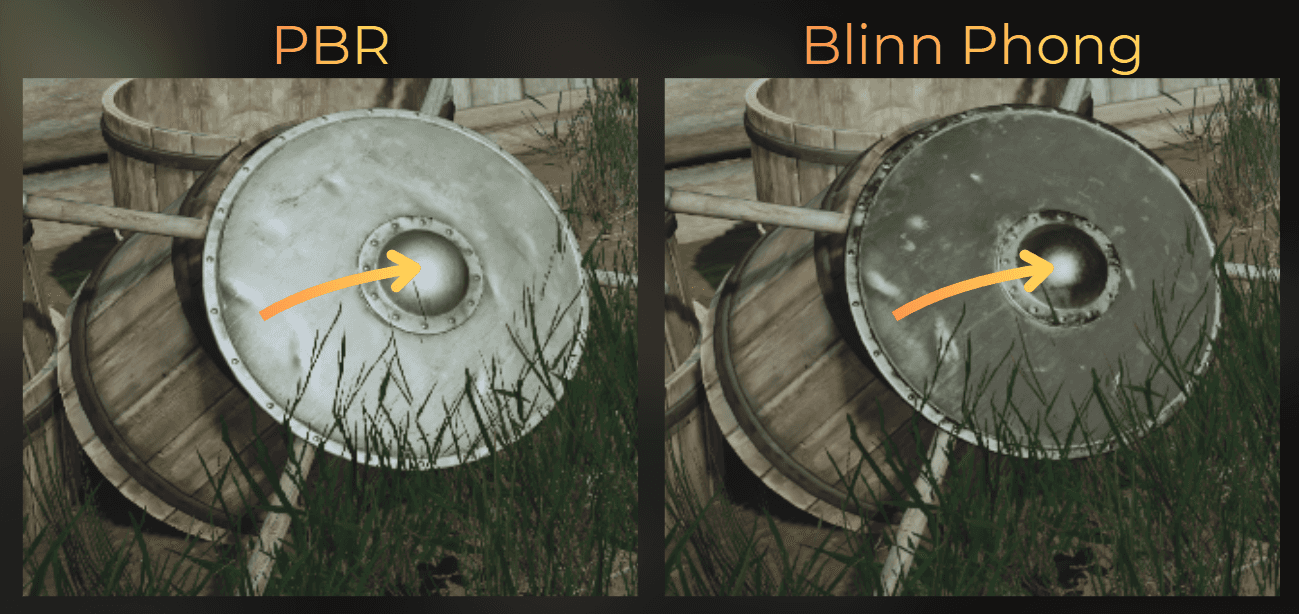
The sharpness of the reflection is controlled by the smoothness parameter, so I adjusted the parameter to make the highlights rougher. That makes them less pointy and brighter.
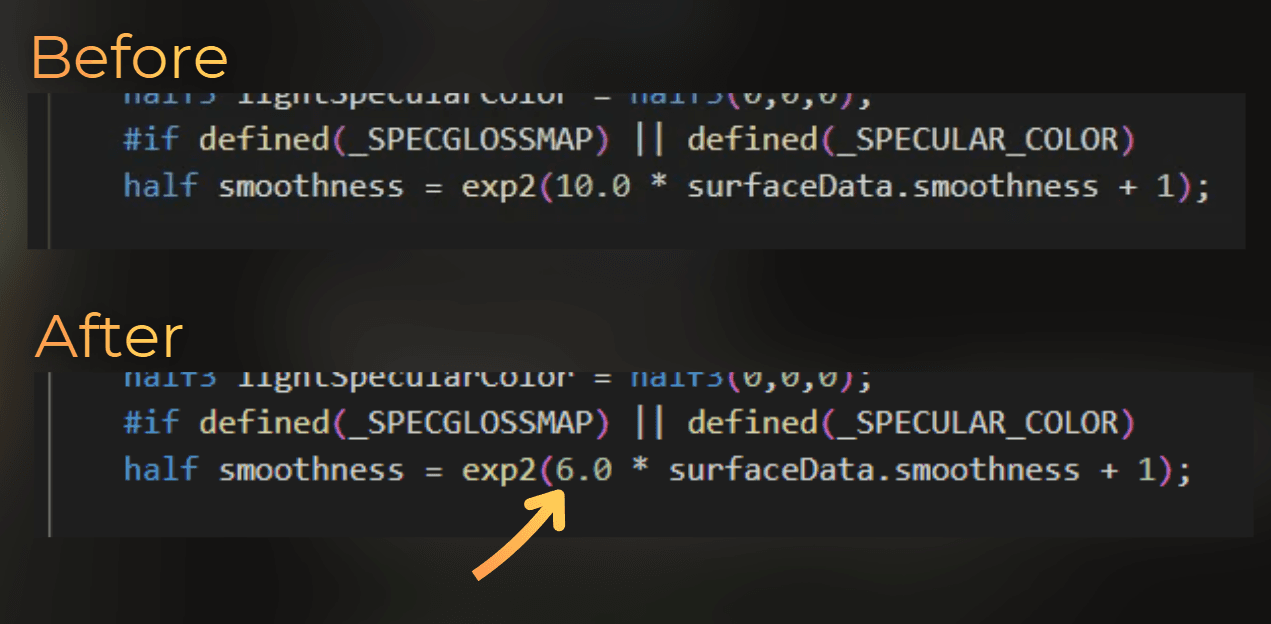
Look, it works!
___
Switching quality at runtime
To be able to switch the light quality, I made this change compile conditionally, depending on the LOW_QUALITY_LIGHTING keyword.
I added this keyword in the custom ConfigureLightOptions Shader Graph node I prepared before, so the shader compiles both versions.
And I created C# logic to switch between lighting quality:
And now I can switch between different shading quality levels at runtime.
___
Simplified light profiling
Let's check the performance of the simplified lighting. After these changes, opaque objects render 0.38 ms faster.
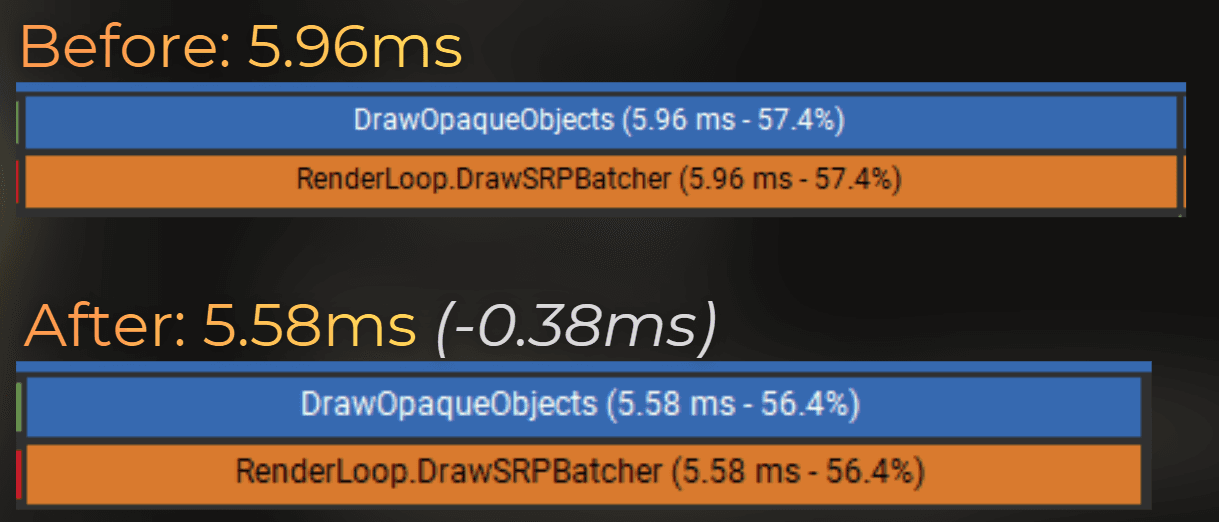
To be honest, I expected more... so let's continue with the optimization.
___
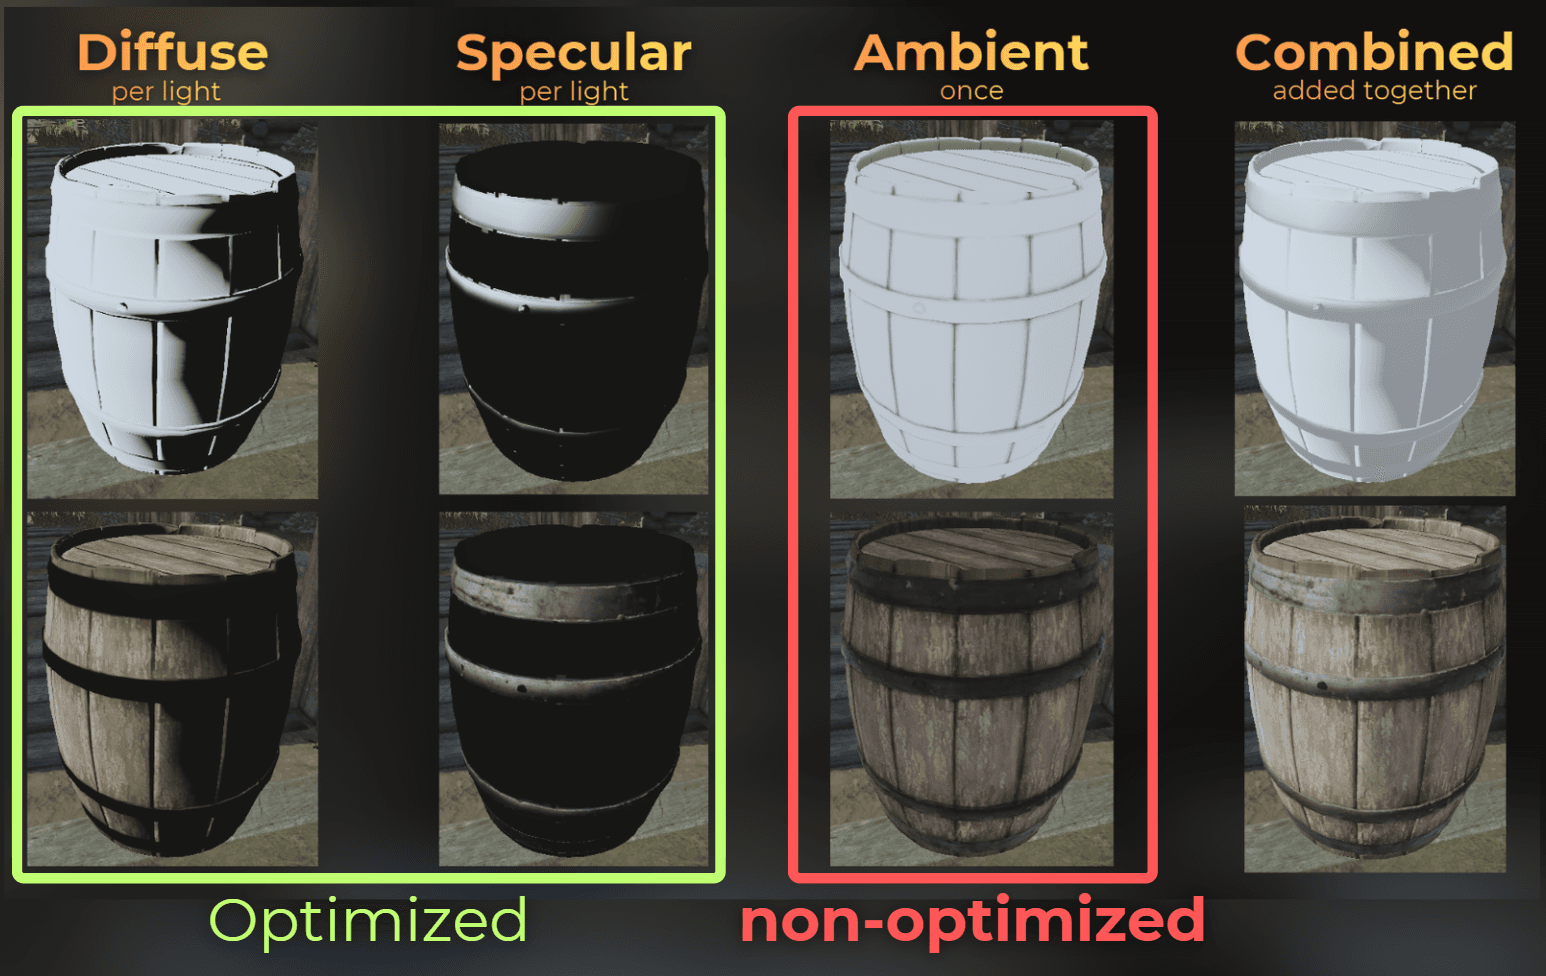
Optimizing ambient light
So far I mainly optimized diffuse lighting and specular highlights. Ambient lighting is not optimized, because it is not calculated inside UniversalFragmentBlinnPhong.
Ambient lighting is computed in the InitializeBakedGIData method in PBRForwardPass.hlsl. In this project, static objects use baked lightmaps and dynamic objects use reflection probe sampling. Ambient lighting is then stored in inputData.bakedGI and used later by the lighting model.
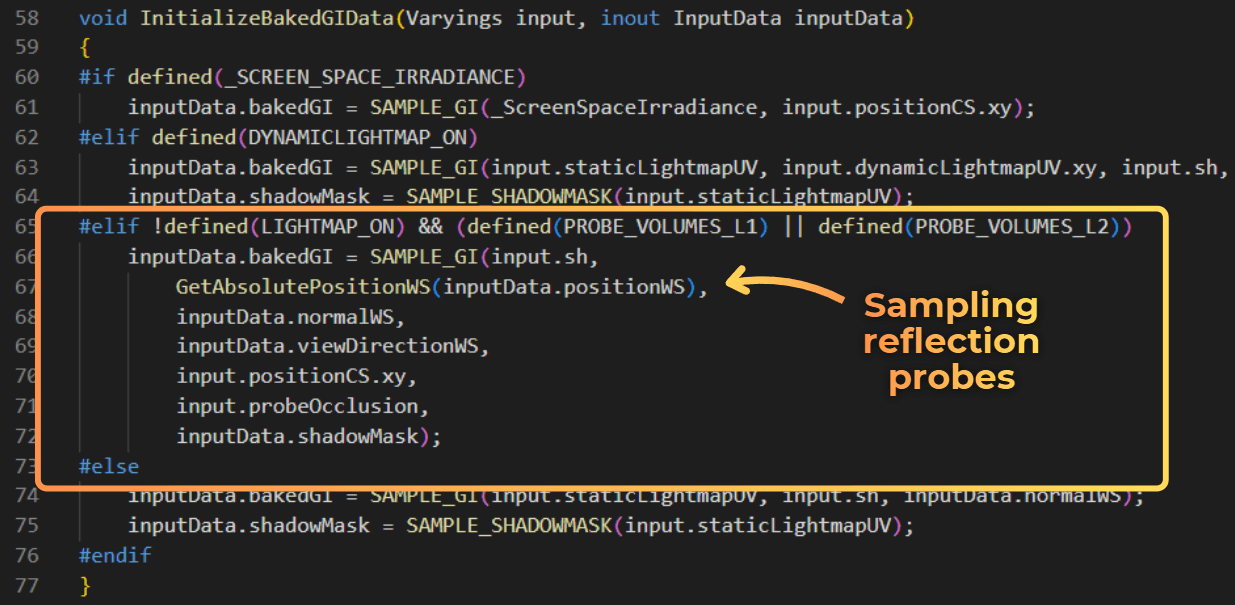
By default, ambient lighting from reflection probes works by sampling a cubemap texture. Calculating the sampling position can be quite taxing, and reading a cubemap texture can introduce cache misses.
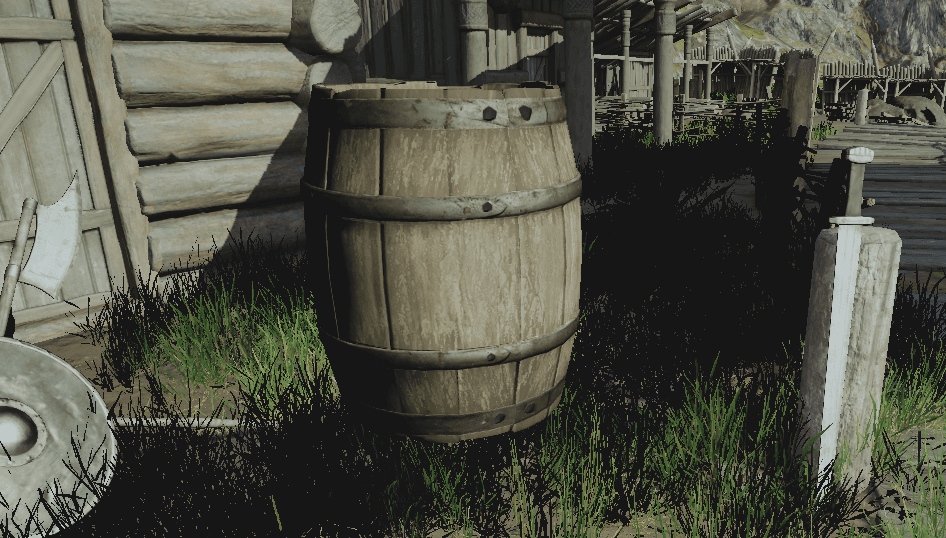
When I set inputData.bakedGI = 0.0f, you can see that ambient lighting is visible mainly in the shadows:
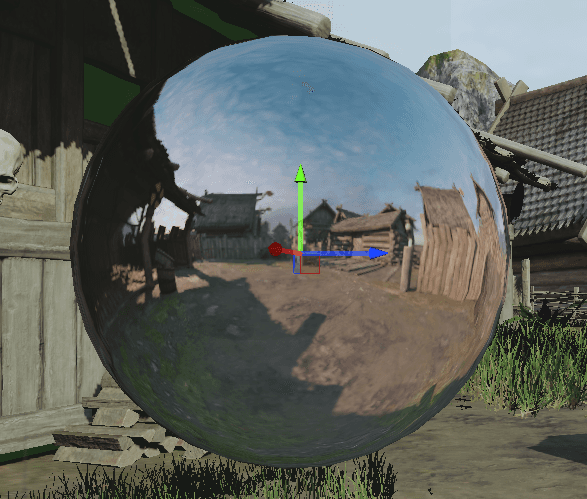
Reflection probe sampling works by using this spherical image to establish lighting around the shaded object.
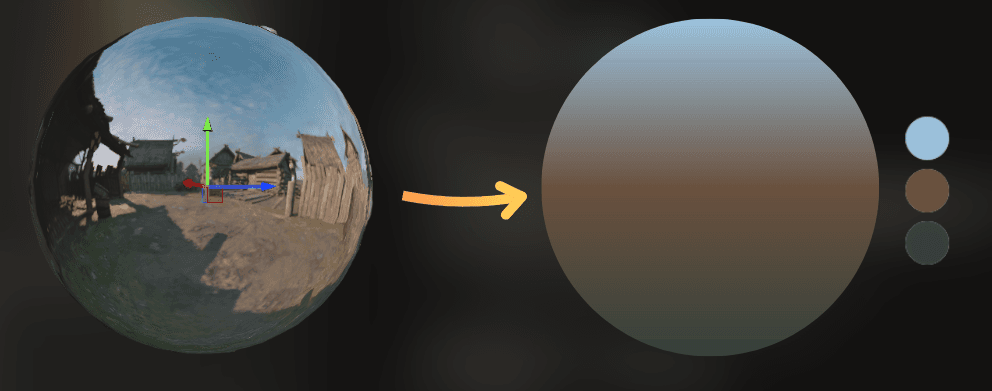
I noticed that most of those reflection probes use similar colors. Because of that, I could approximate the probe colors with a vertical gradient using three colors:
So I modified the code to use simplified probe sampling. This is the modified HLSL code:
And I added an option to set the gradient colors at runtime:
This is how it works:
___
Optimization results
Now it's time to compare the performance of the low-quality lighting:
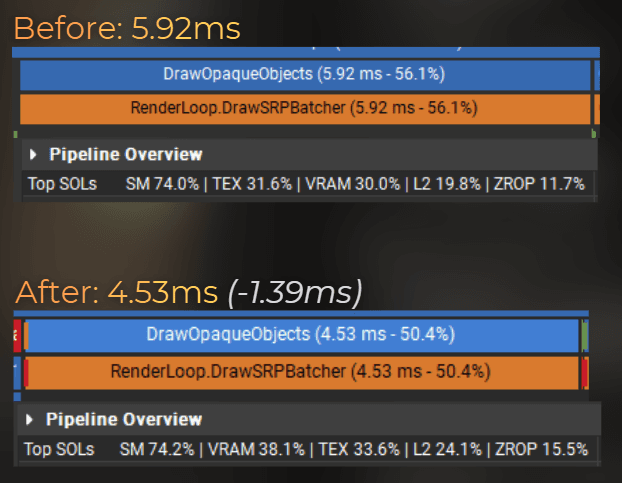
Notice that VRAM and ZROP throughput increased. It means that the shaders increased the speed of outputing the pixels to the screen.
Average frame render time dropped from 9.66 ms to 8.19 ms.
And here is the visual comparison:
___
Summary
Simplifying the lighting model can be a great way to improve the game's performance, especially when you need to optimize for low-end platforms.
Let's see the pros and cons of my solution.
Pros:
25% faster rendering of opaque objects
Can be enabled conditionally, for example in the game settings, to improve performance on low-end hardware
Easy to extend further:
improve probe quality by creating a more advanced gradient
customize probe placement
calculate part of the lighting per vertex instead of per fragment, for example diffuse lighting and ambient light
Cons:
Doubles the memory required for the shaders, because each shader variant needs to be compiled twice to support both lighting models. It can be optimized by using custom shader stripping that removes additional lighting features when low-quality lighting is enabled.
Lower visual quality
Should be adjusted and tweaked for each game separately
___
Want more?
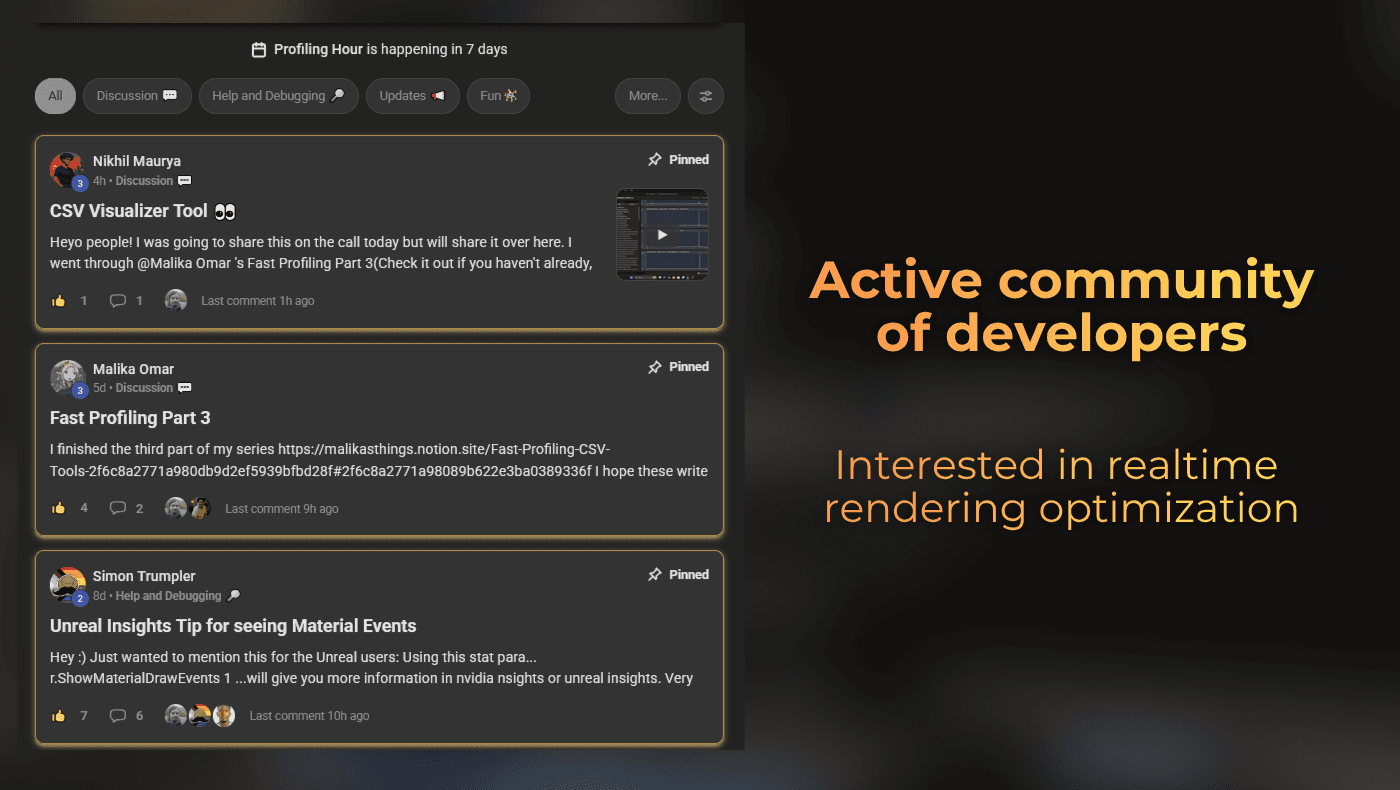
I started a small community about realtime rendering optimization. It is free. We meet each saturday to discuss or profile games.
Join here