Rendering
Tech-Art
Tutorial
Intermediate
GPU Buffers in Unity: 101
5 min

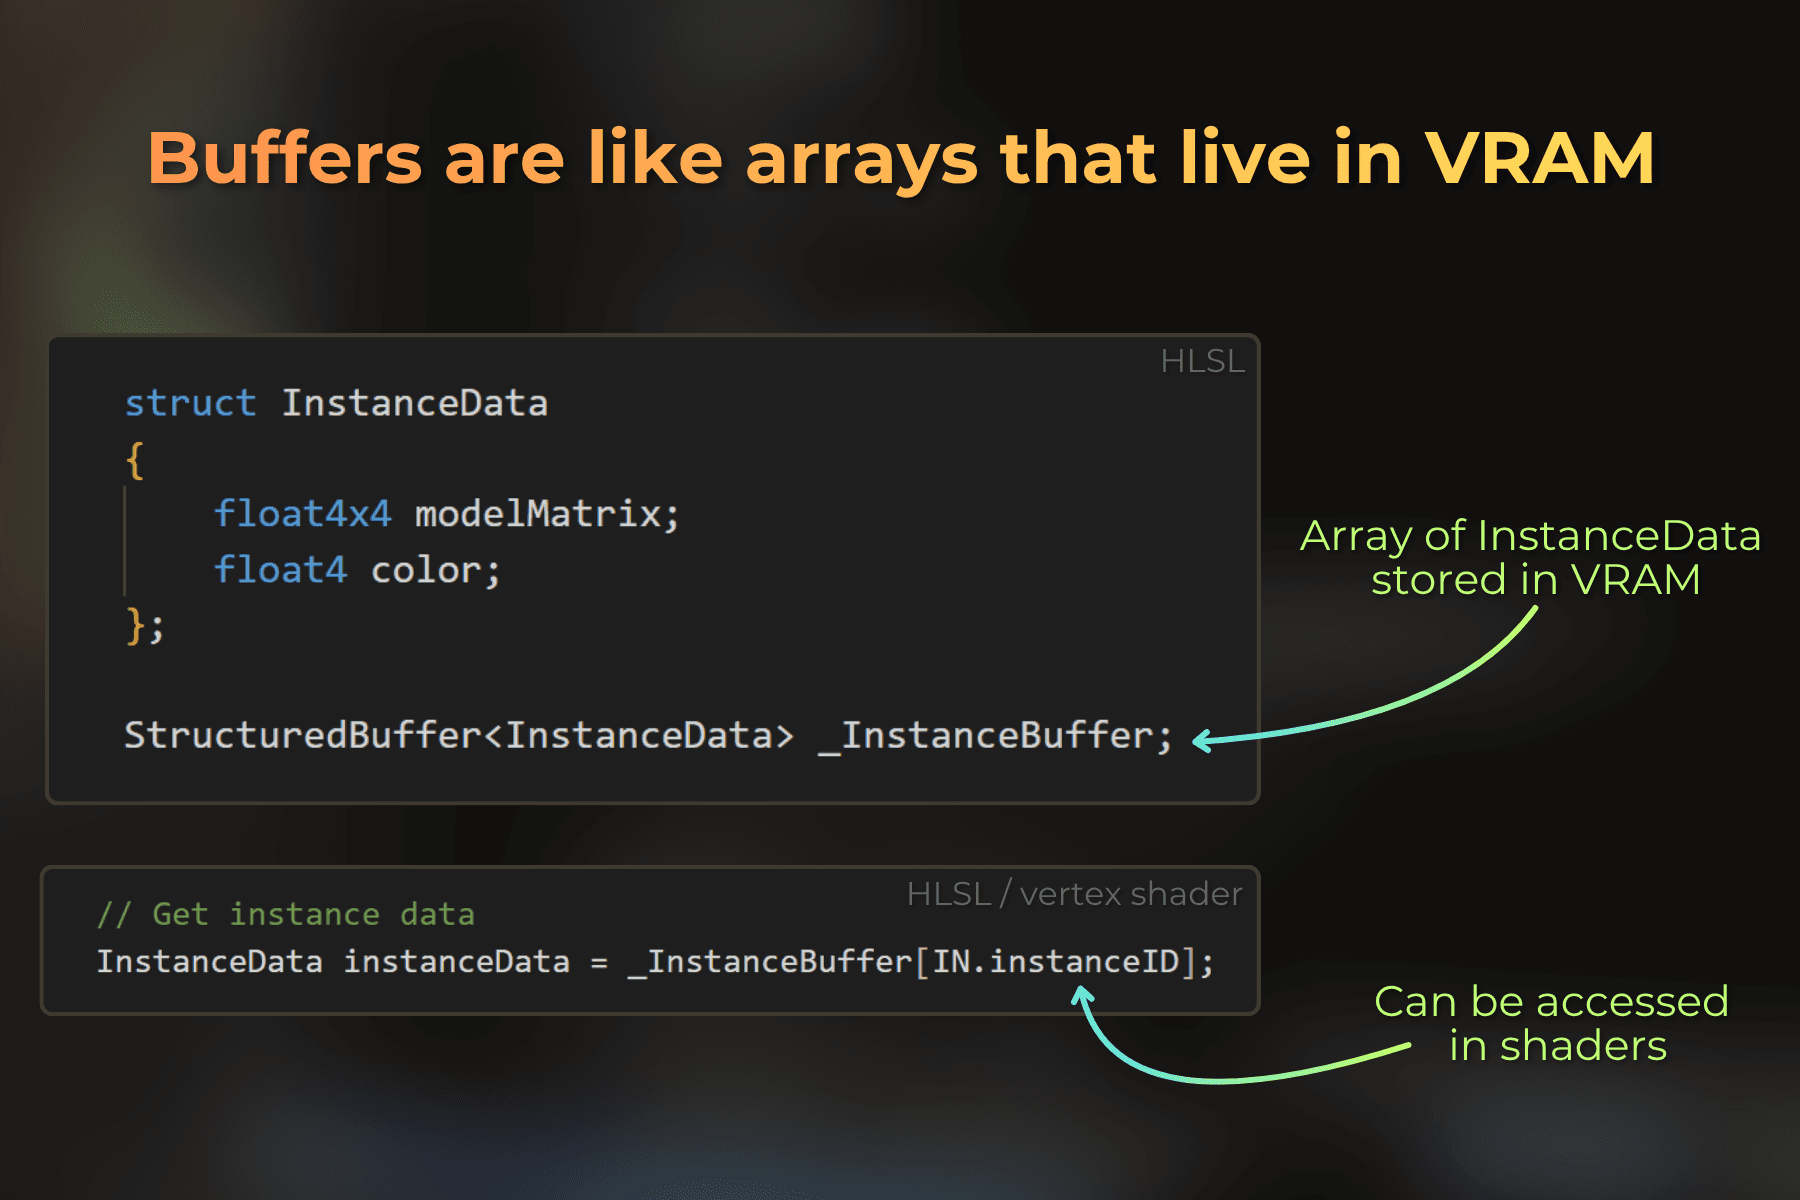
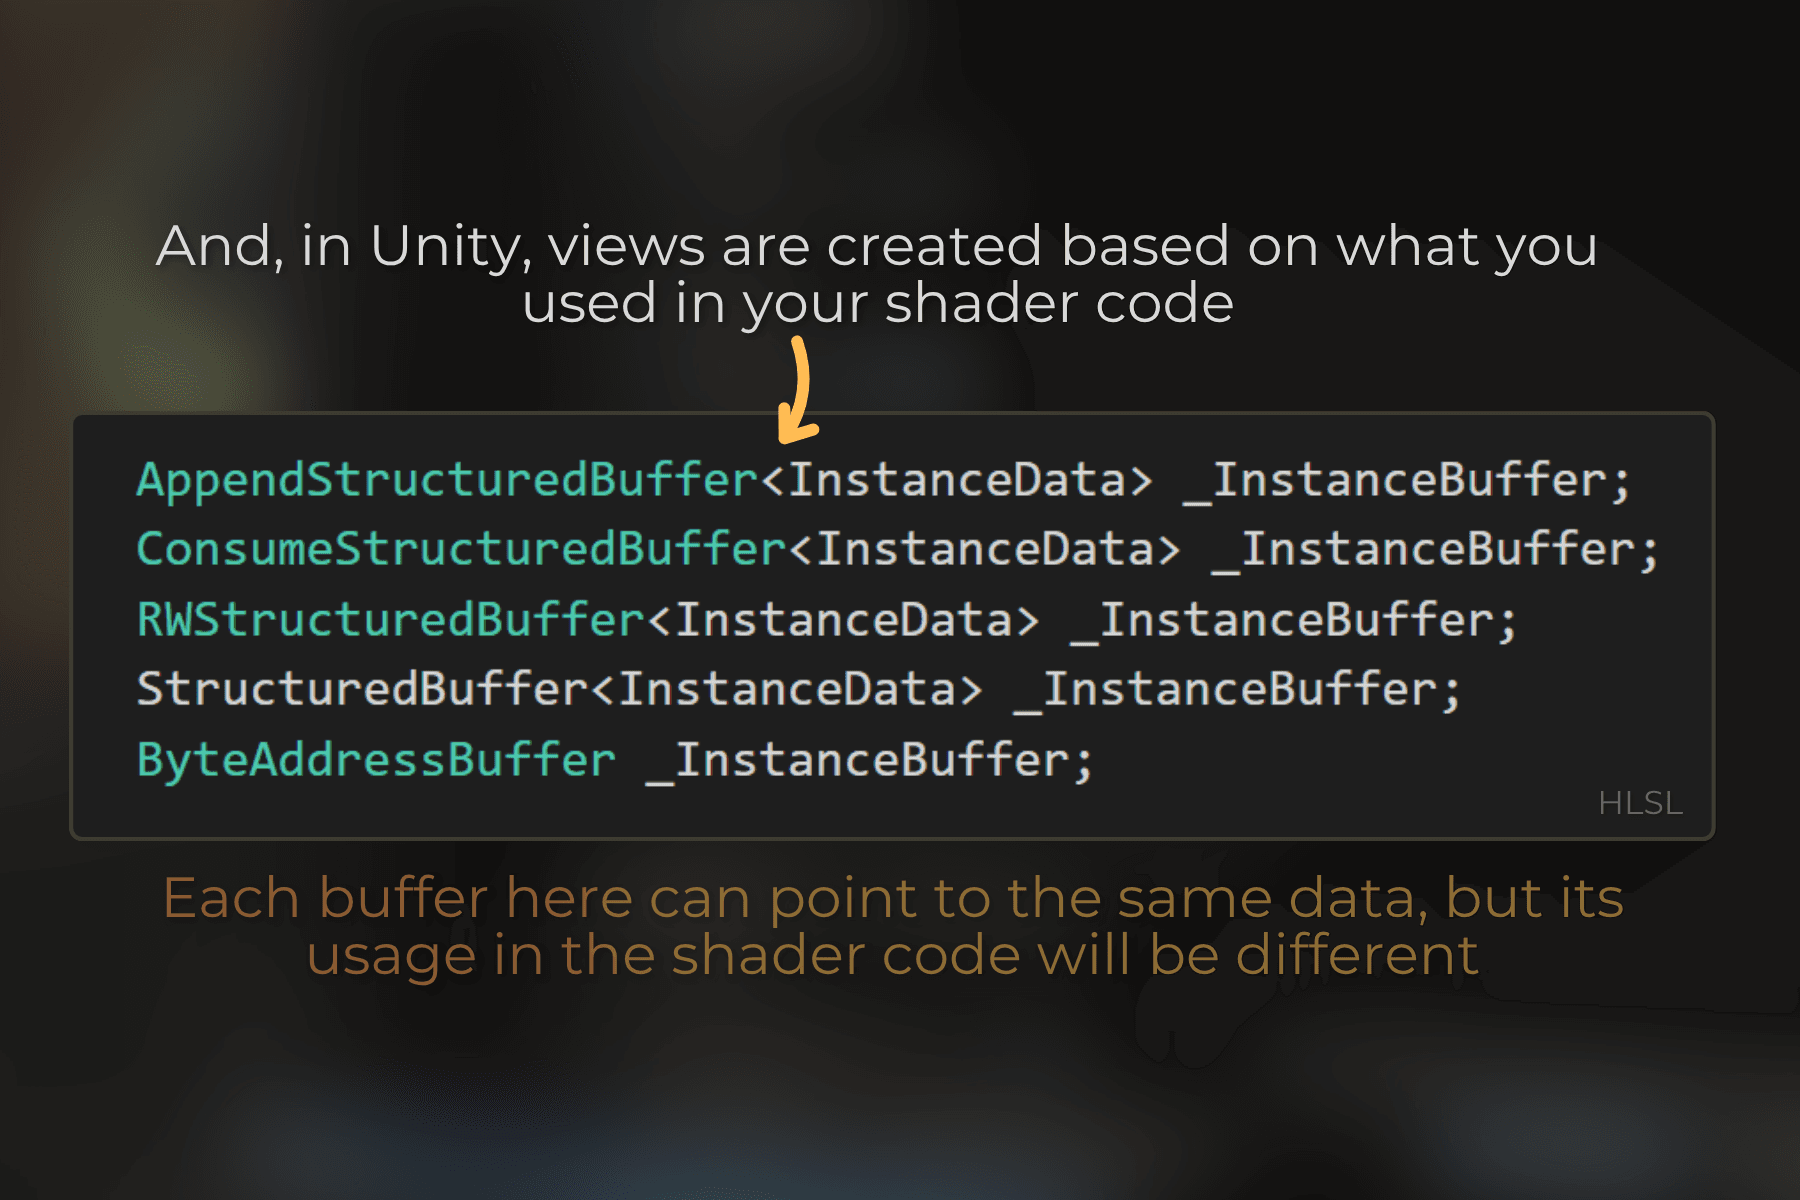
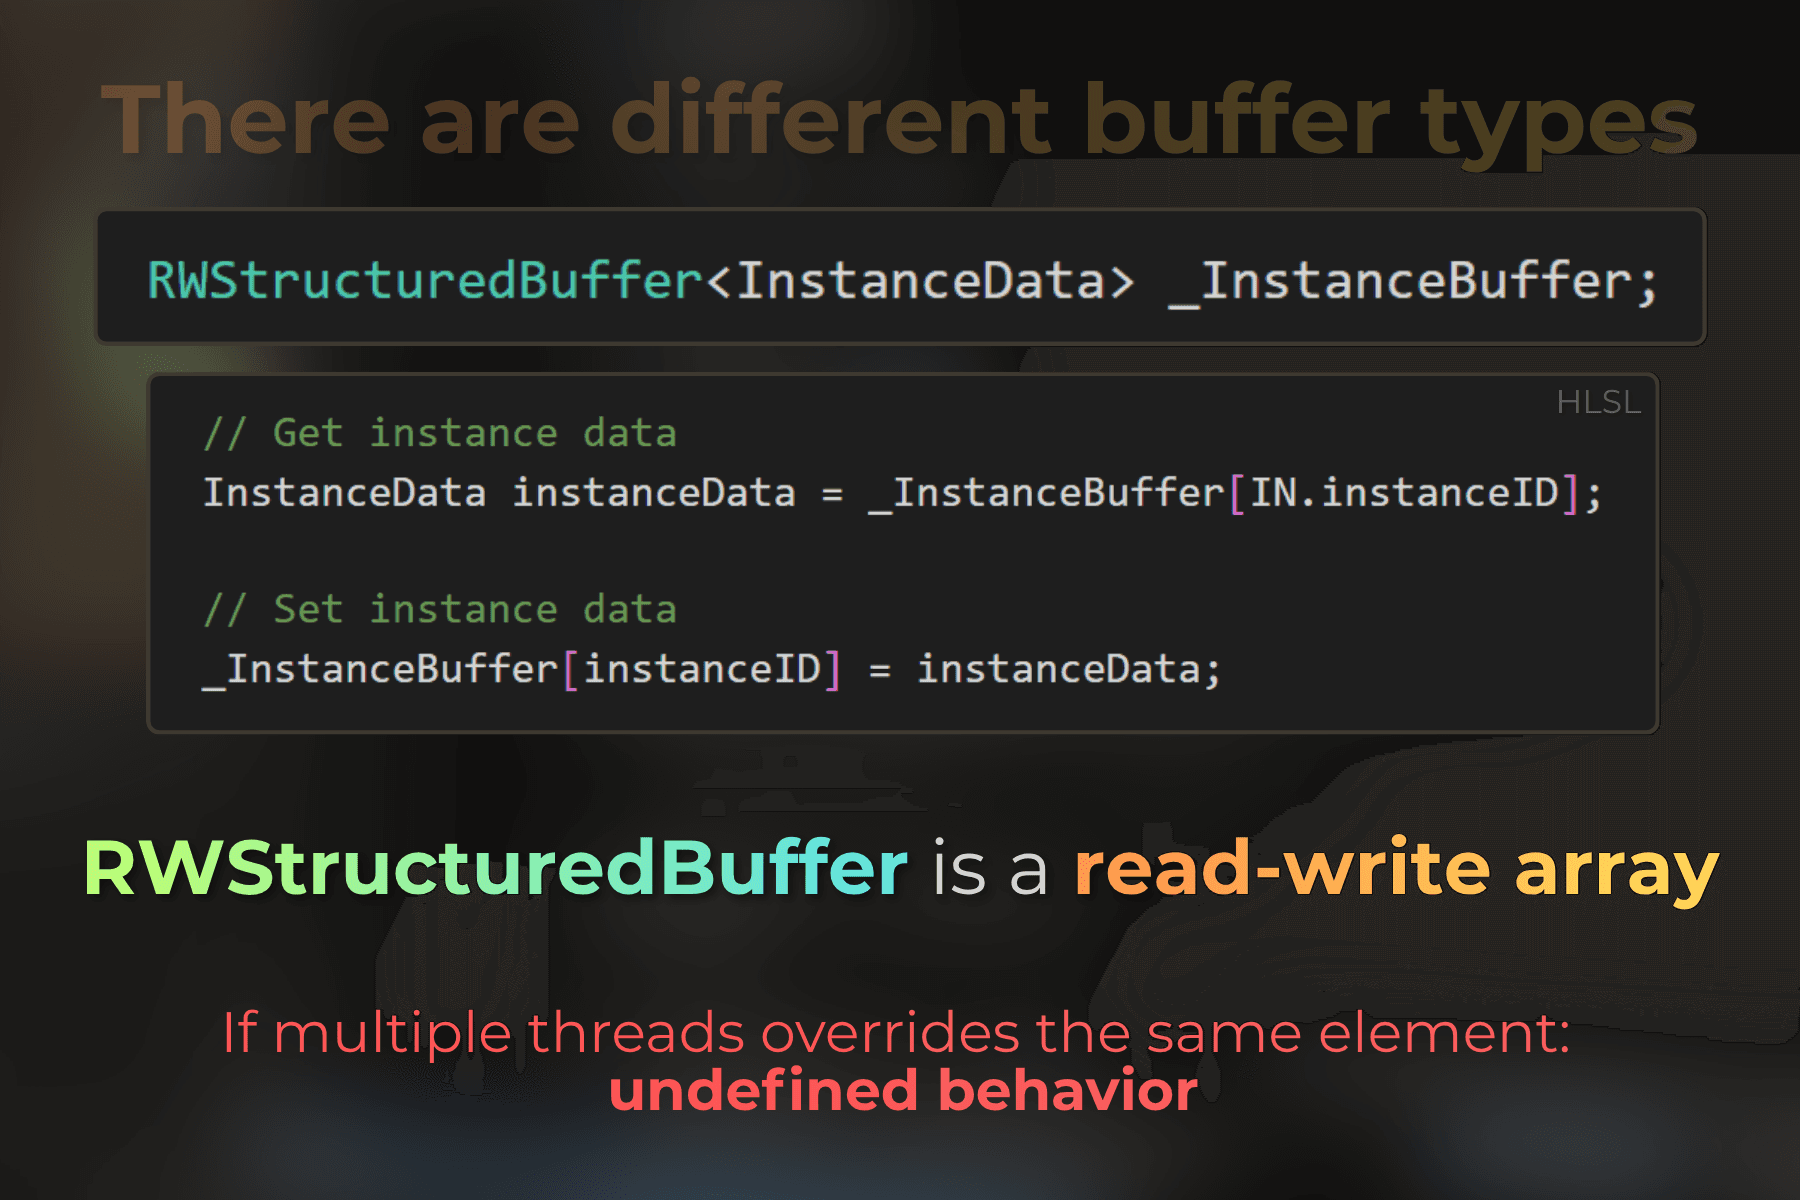
At the very start of my journey with compute shaders in Unity, most of the materials and code samples I learned from were using RWStructuredBuffer or RWTexture2D for data manipulation.
And for a long time, I thought that "fixed-size array" was all there was 😆
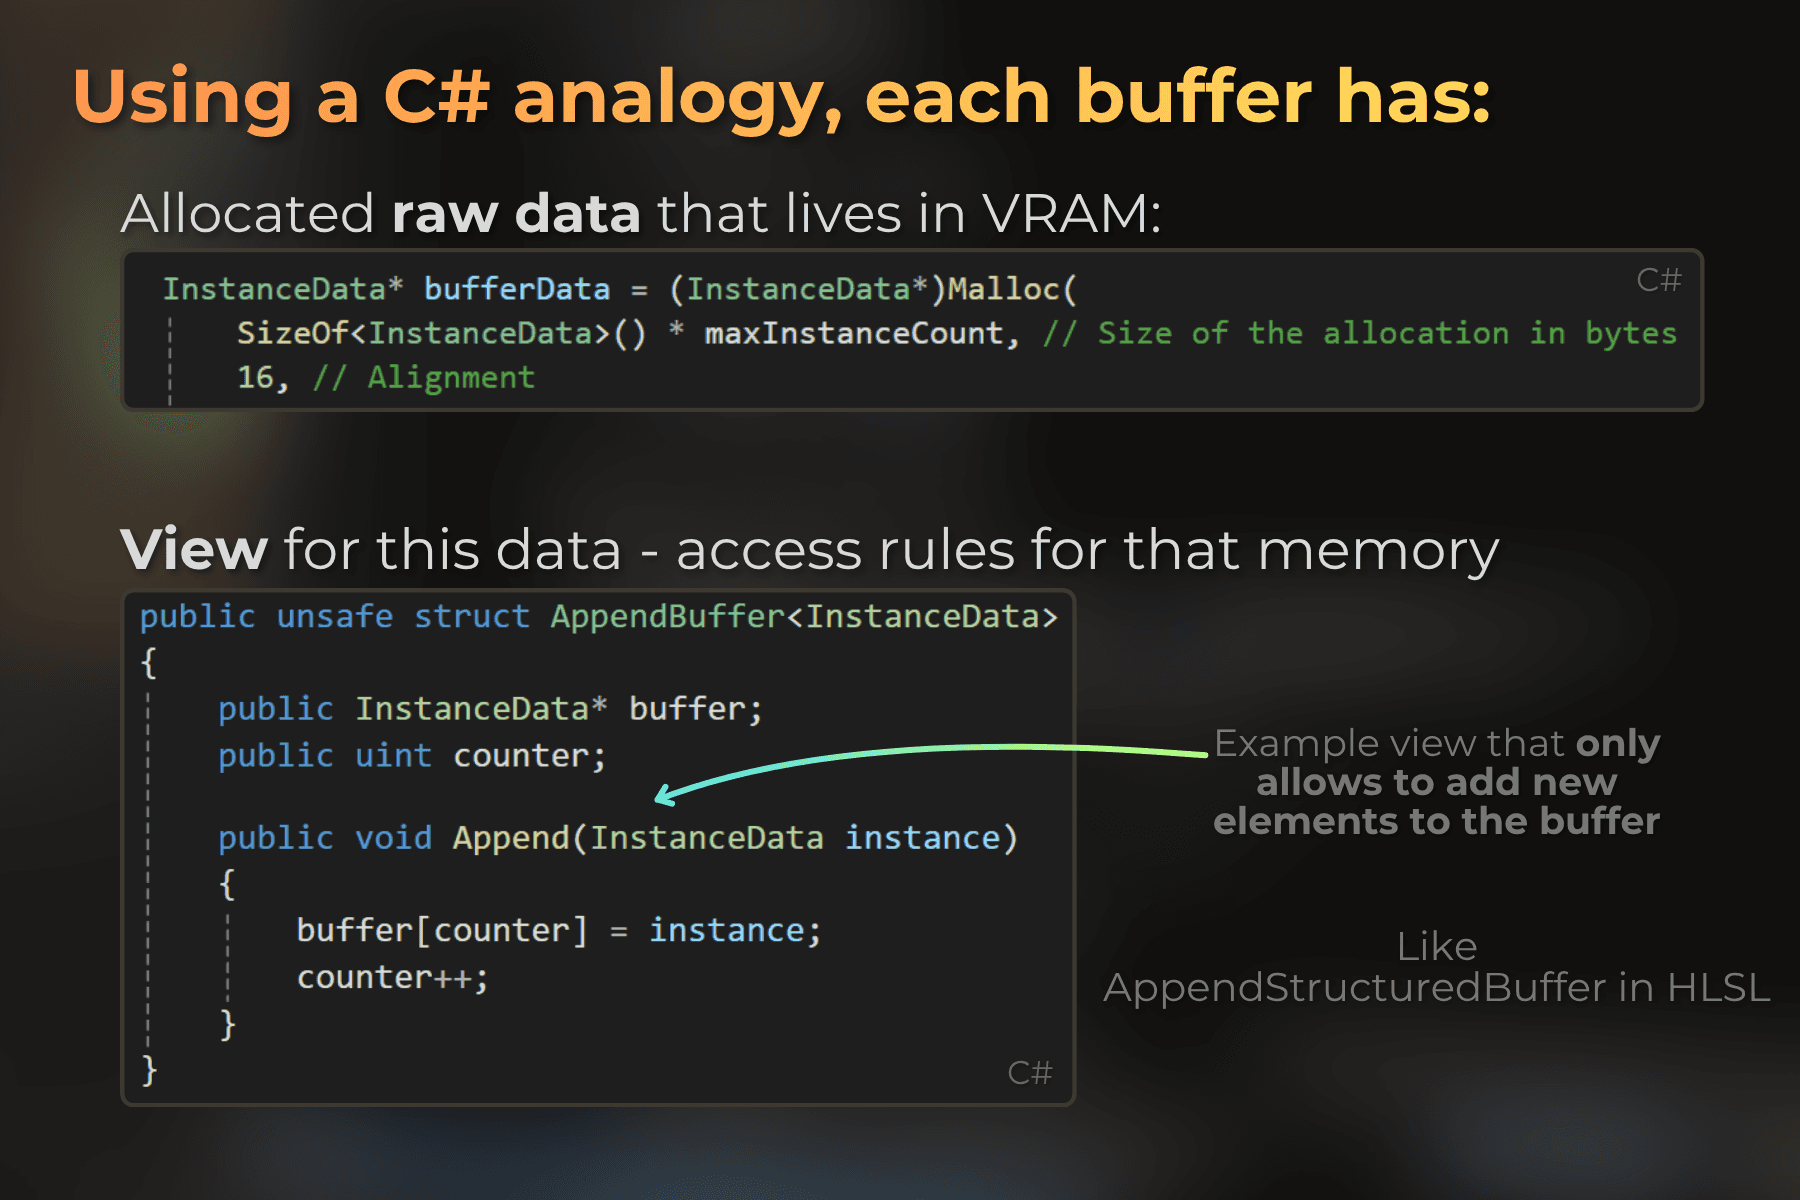
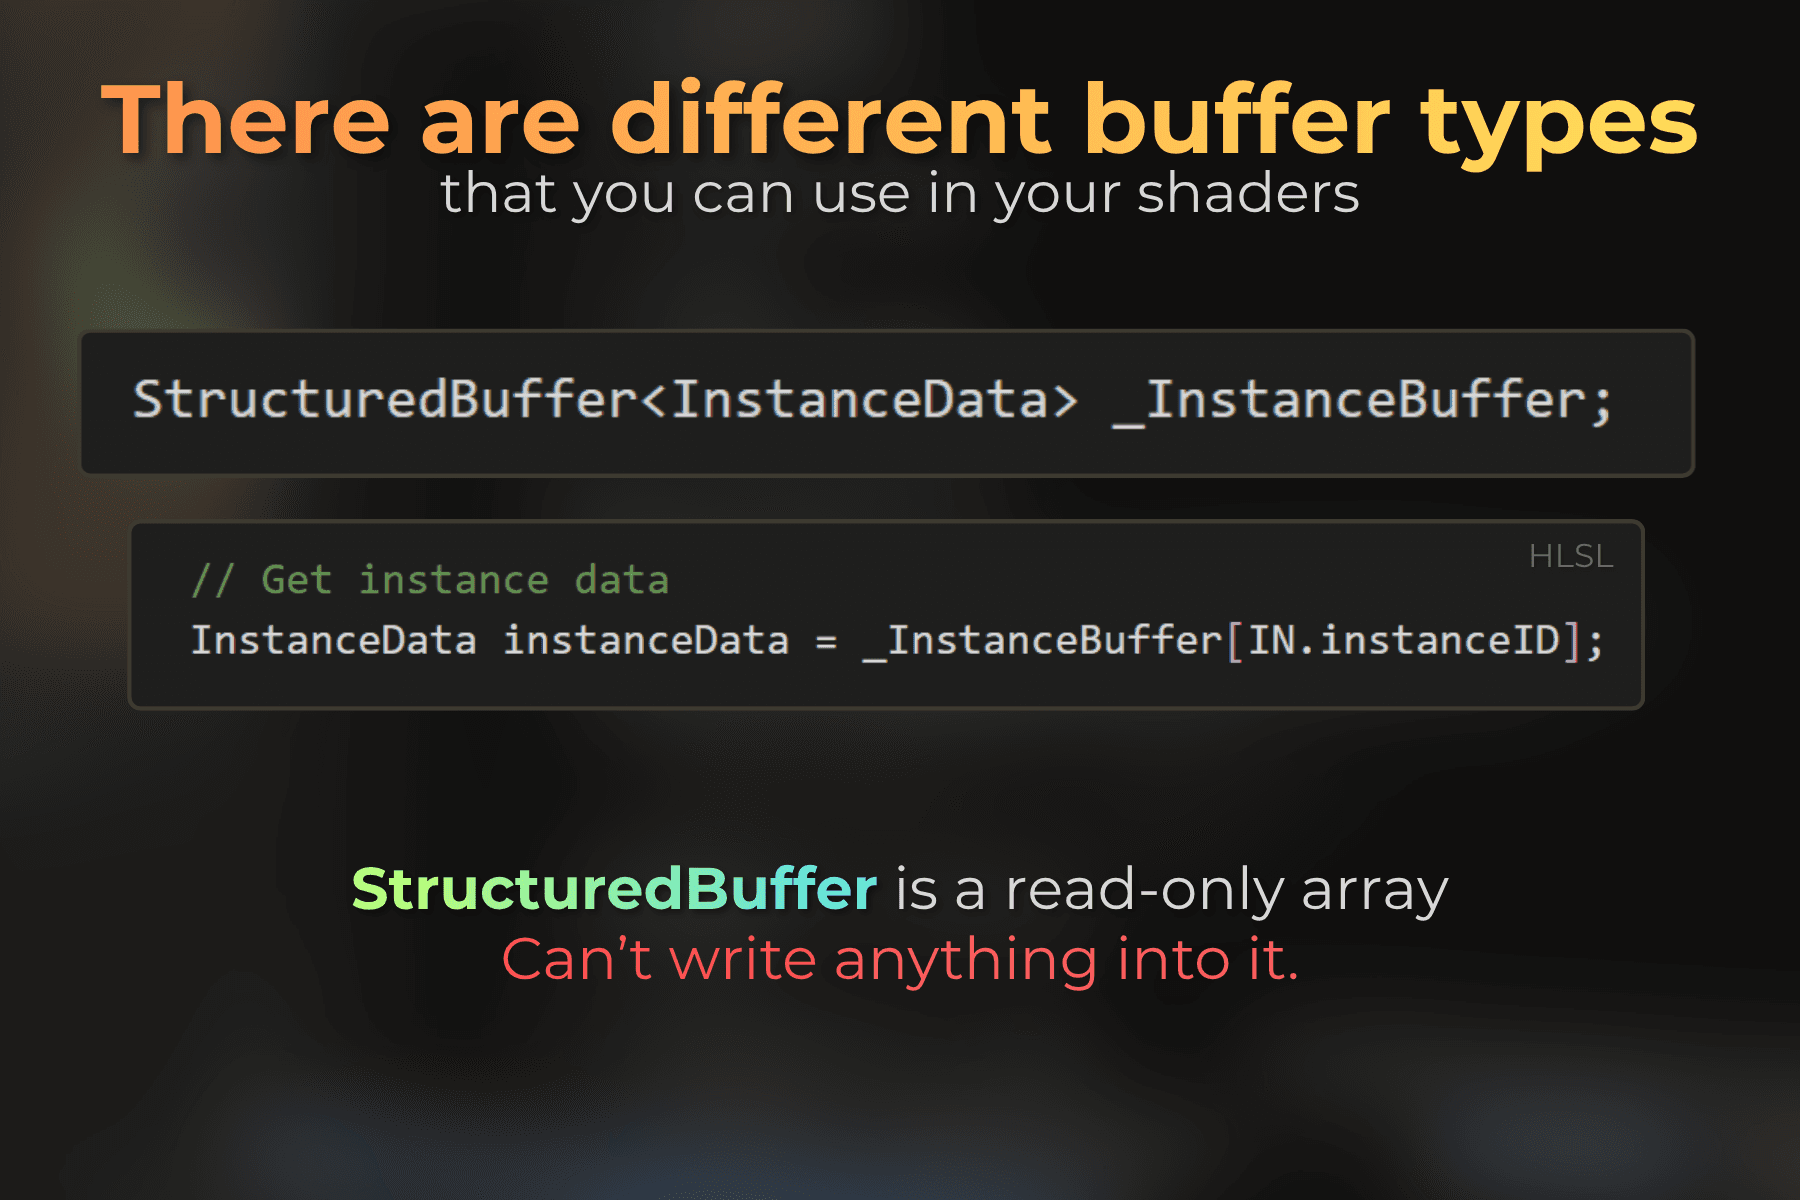
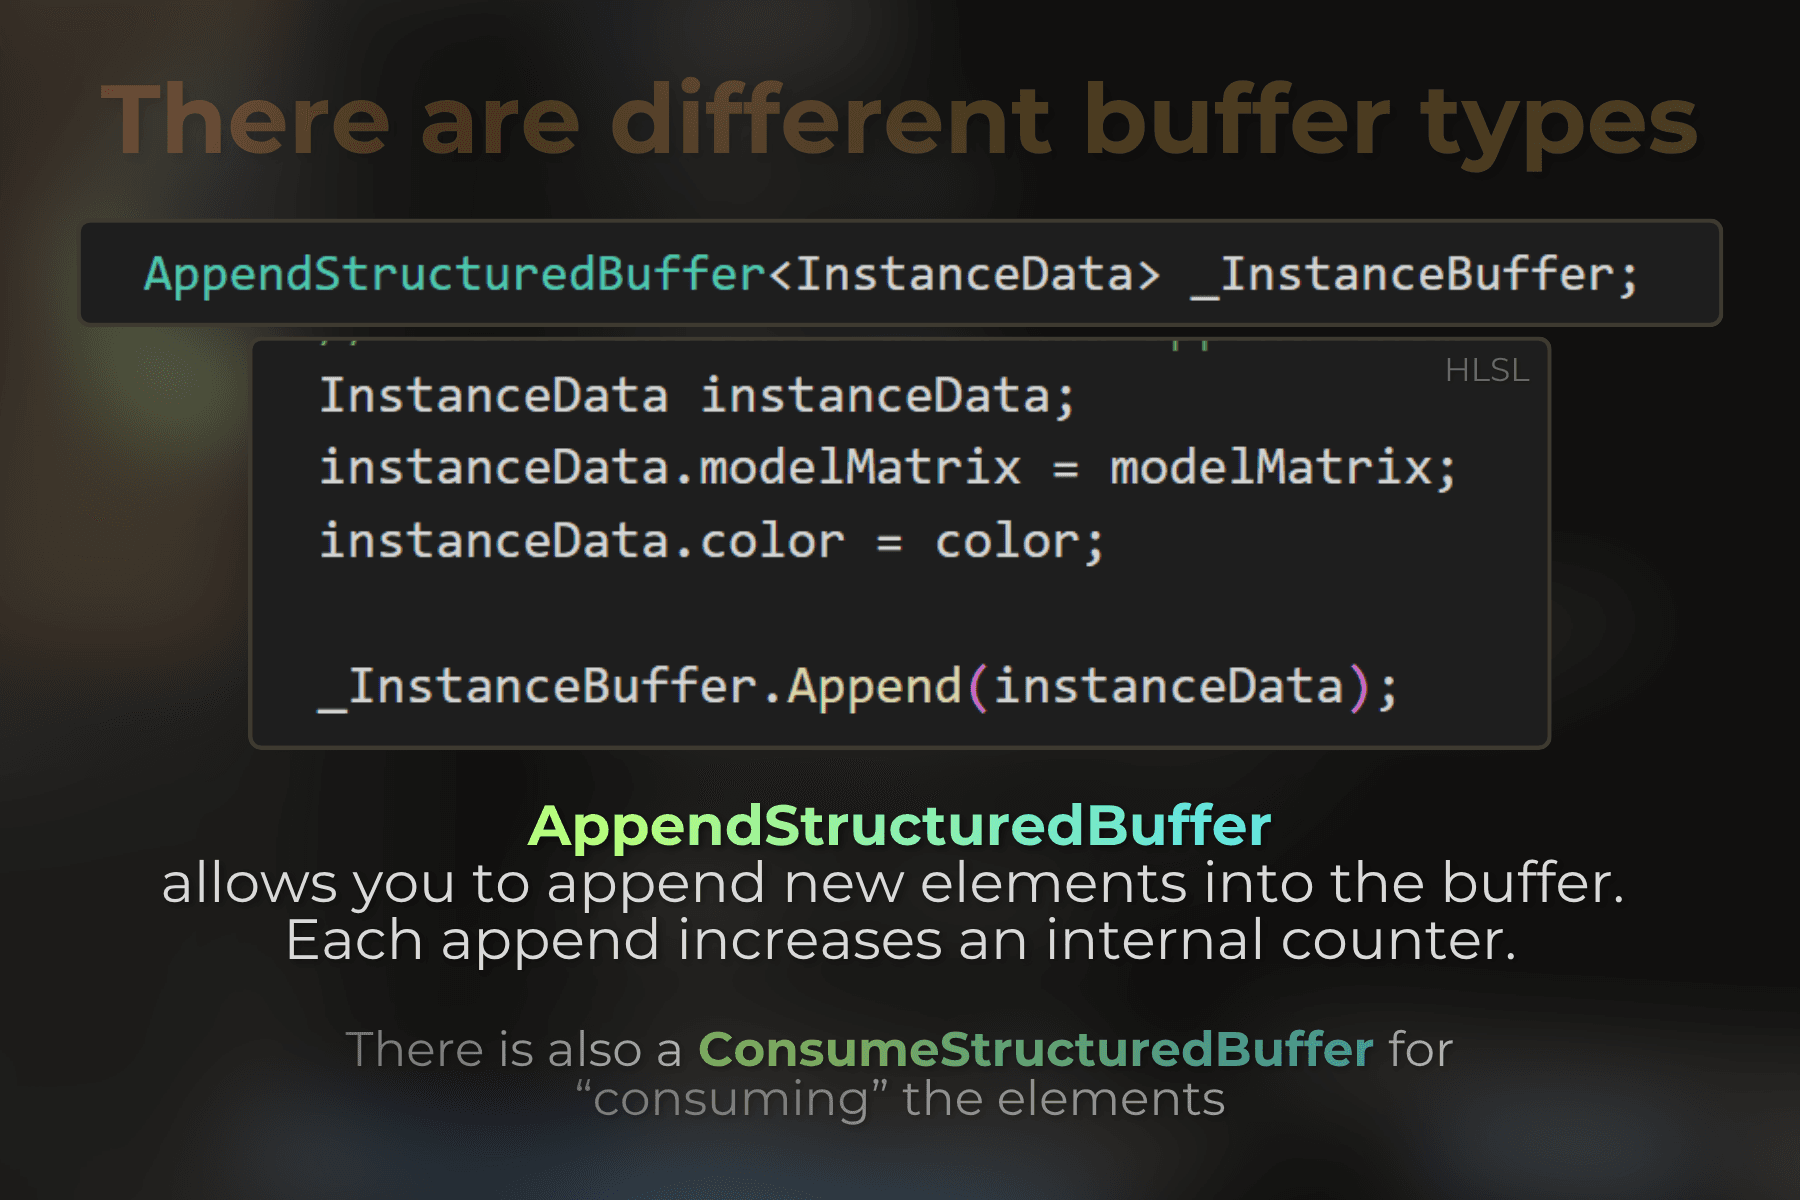
But at some point, I went through the HLSL documentation and, to my surprise, I found many different types: AppendStructuredBuffer, ConsumeStructuredBuffer, ByteAddressBuffer, and more.
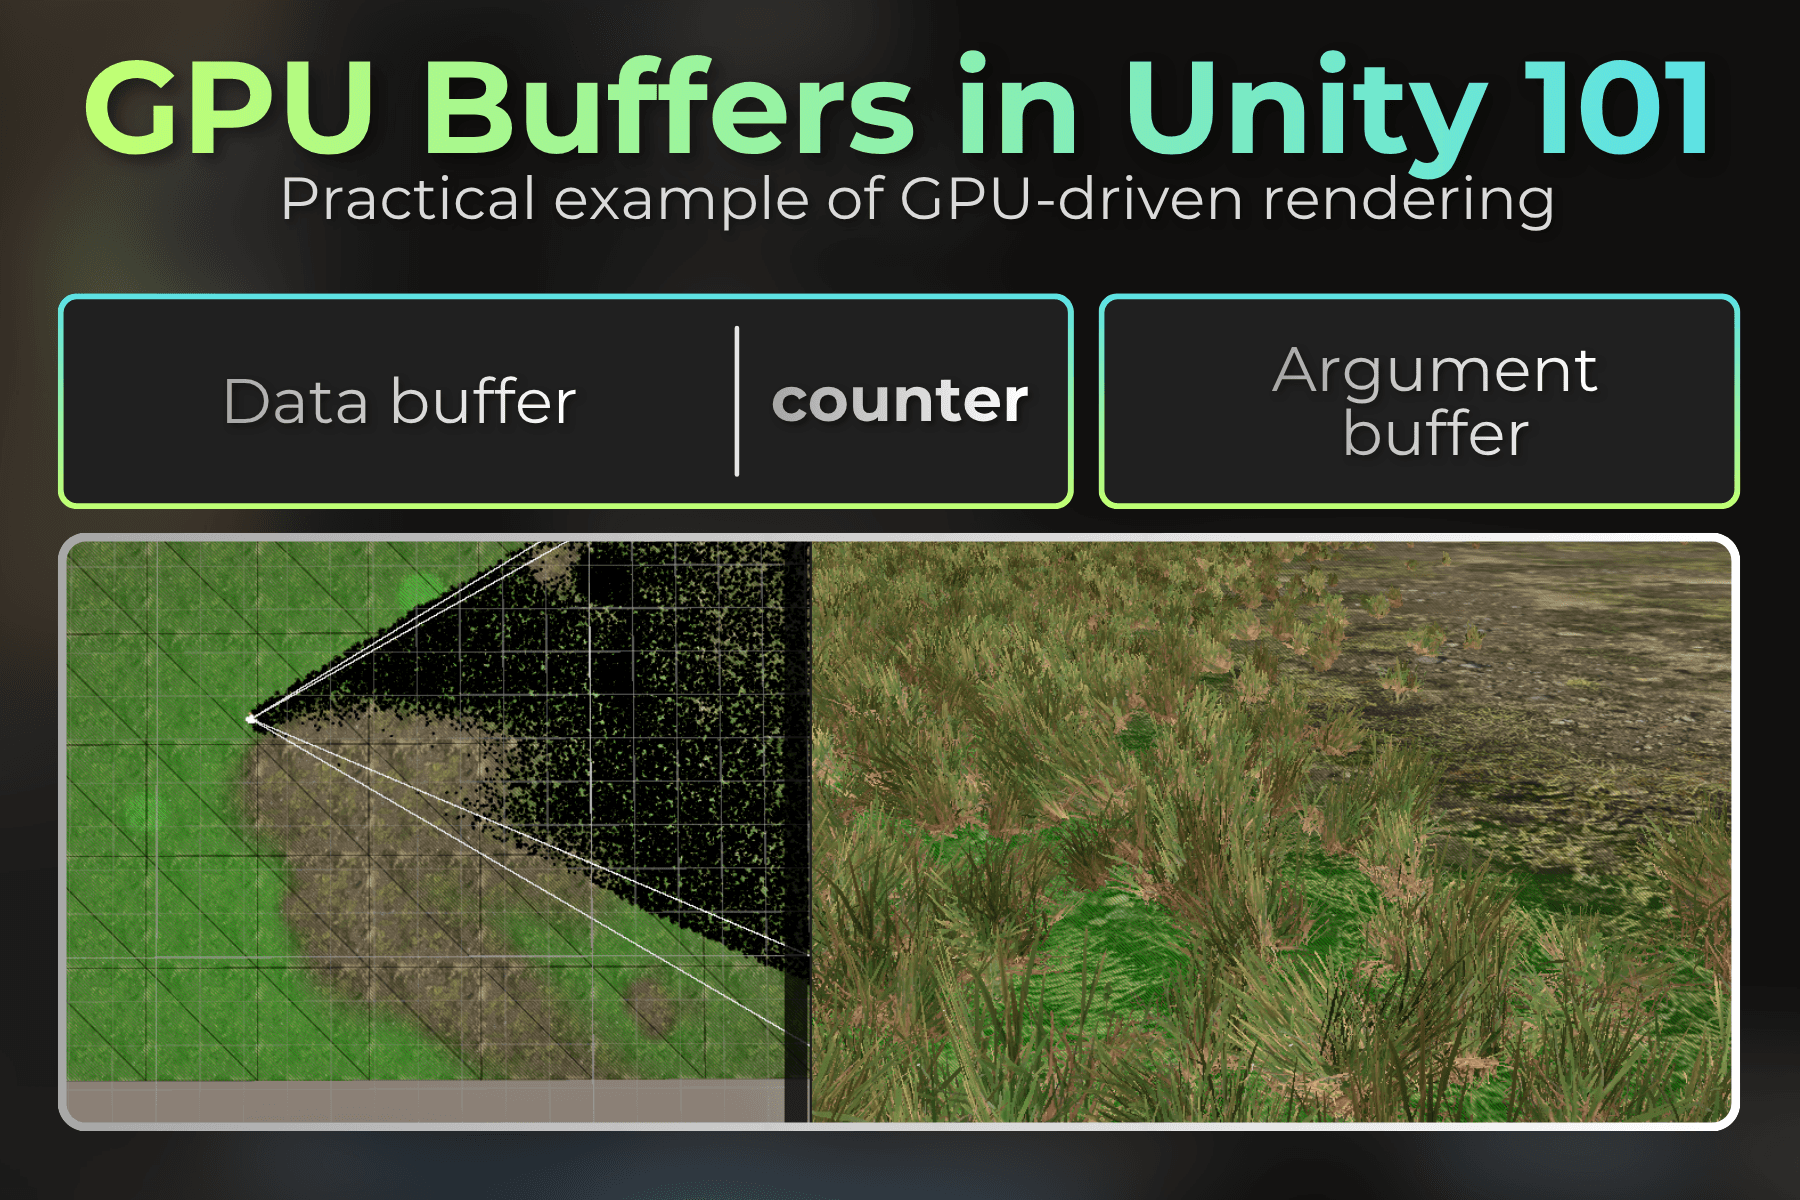
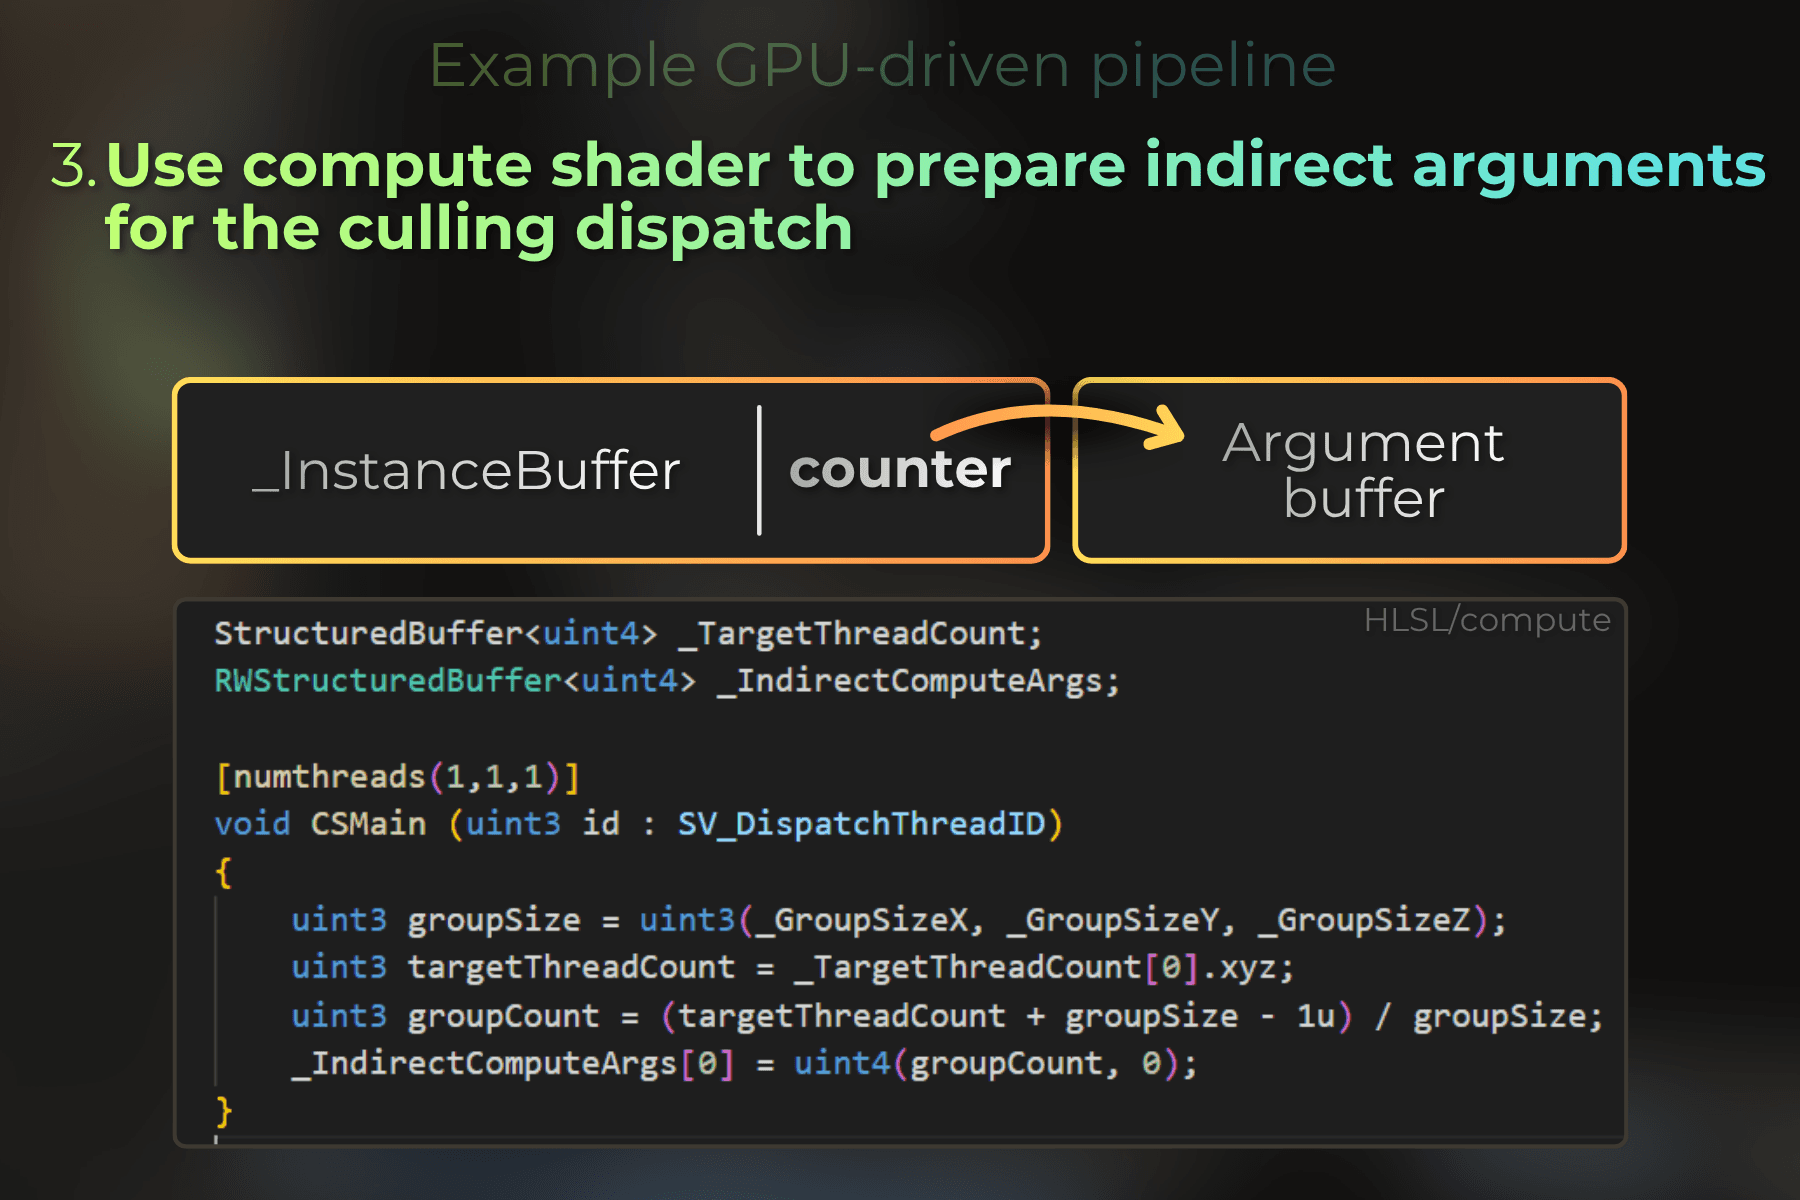
Understanding the different buffer views in HLSL allowed me to use GPU memory as lists, queues, arrays, and draw call parameters, depending on what I need.
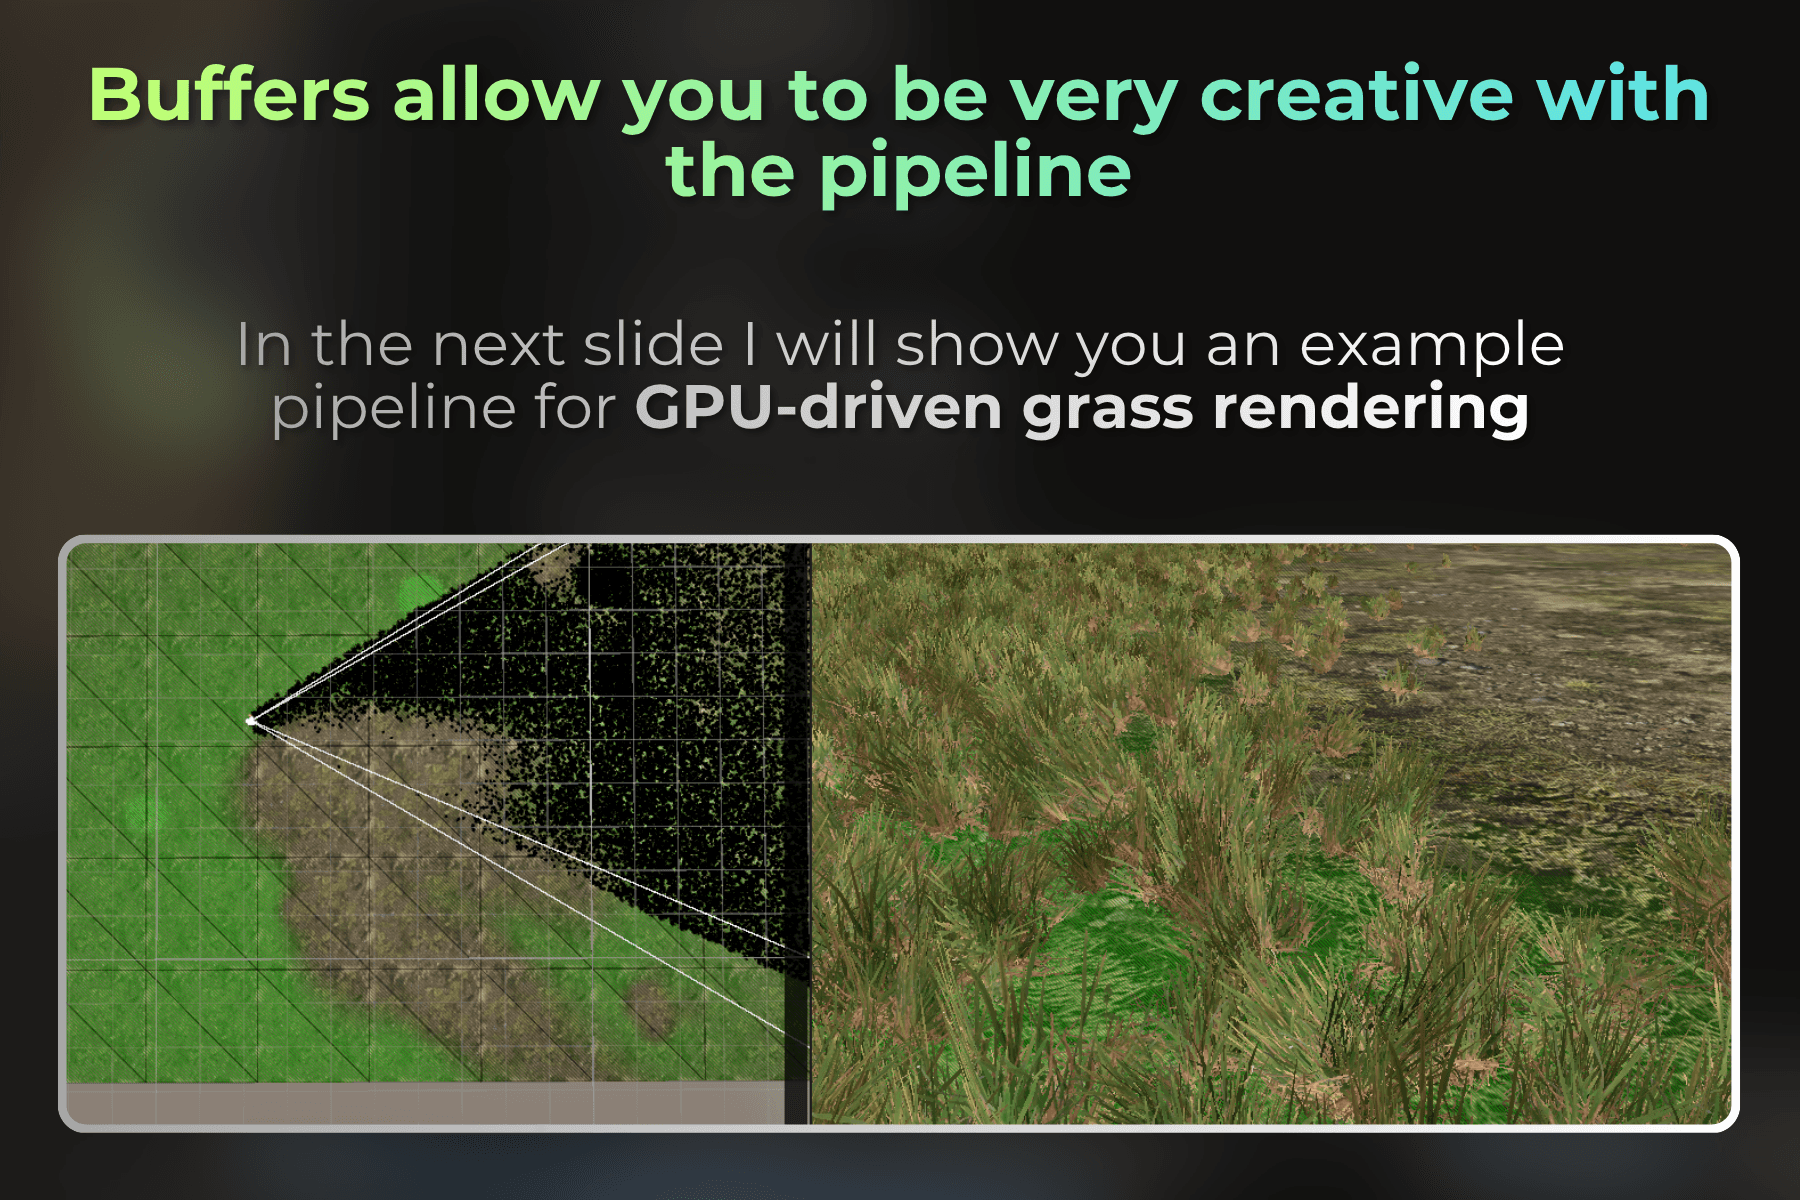
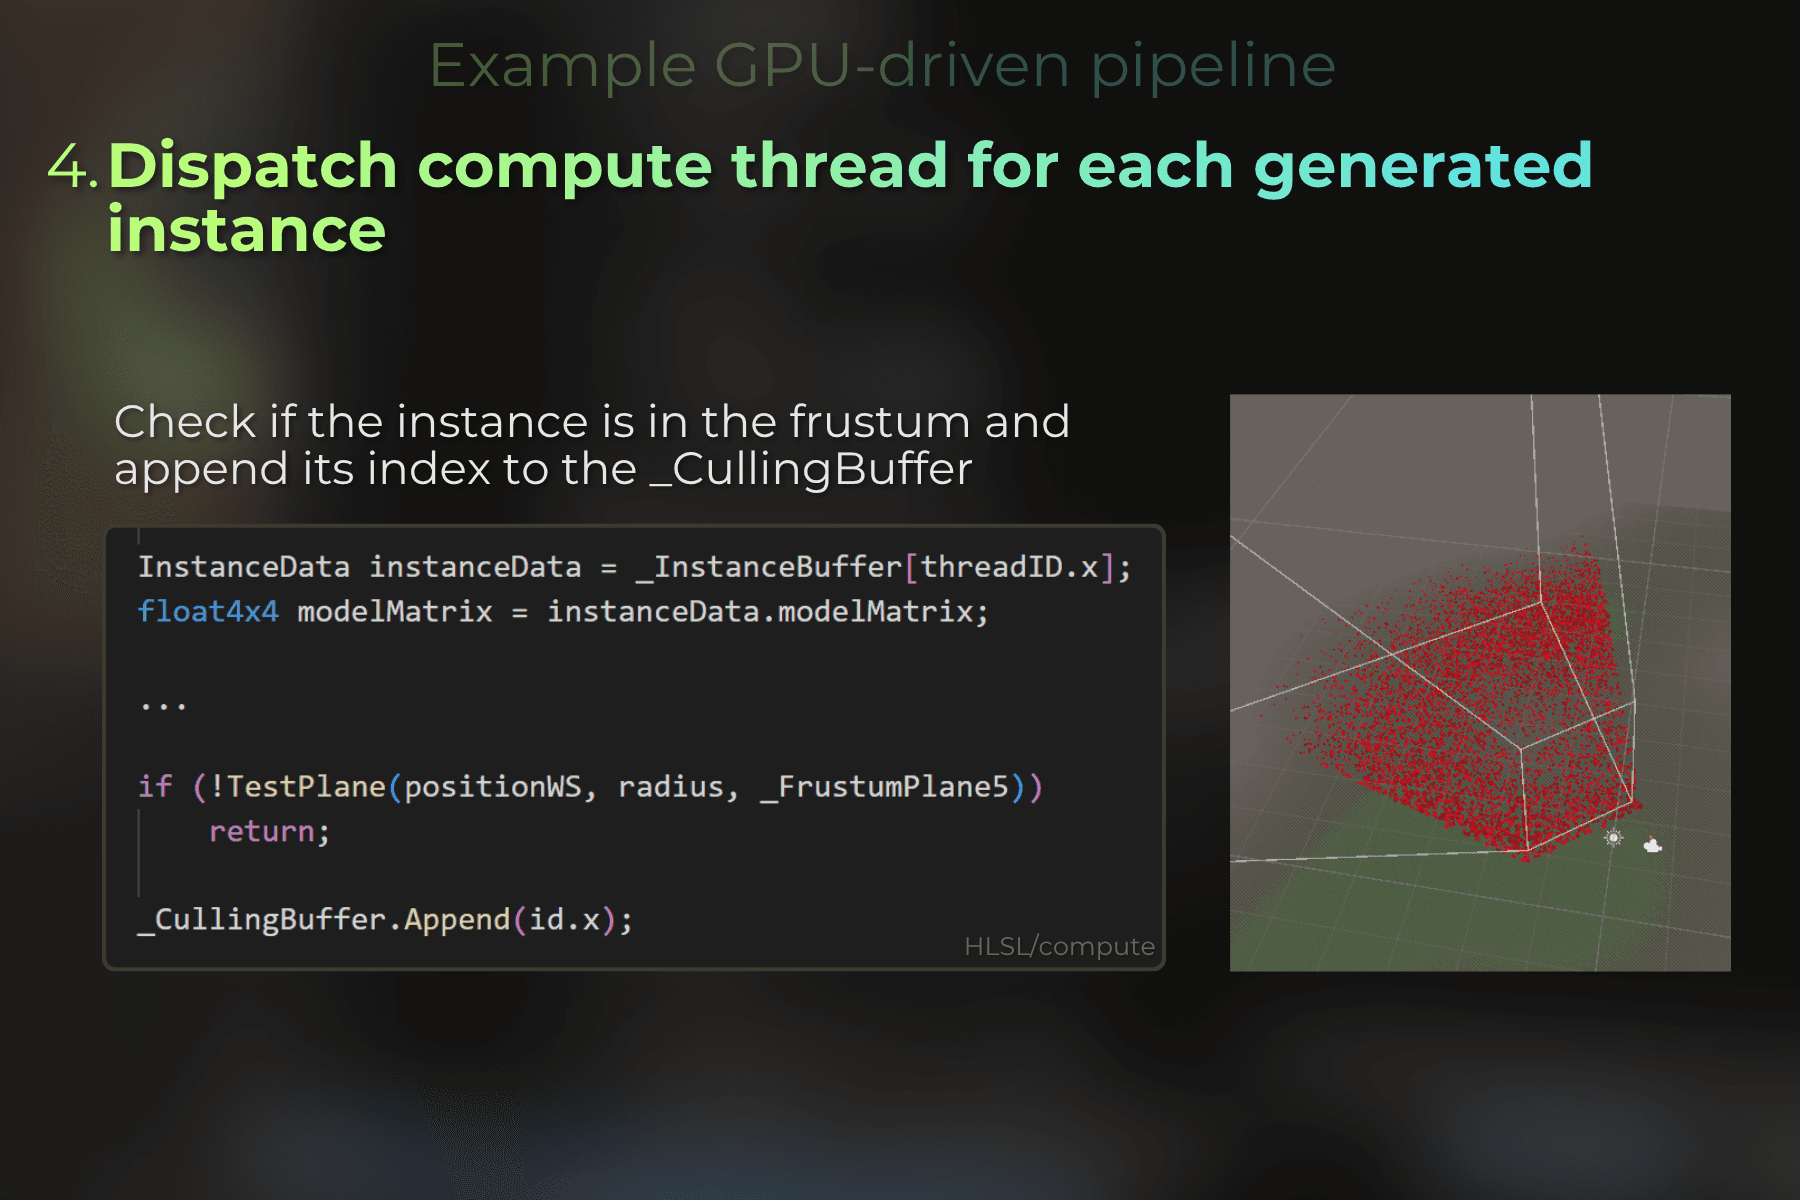
Mastering different buffer types unlocked new possibilities on the GPU. One of them is GPU-driven rendering, where instance generation, frustum culling, LOD selection, and rendering can all run on the GPU, with very limited CPU overhead.
Here is how I think about buffers, compute shaders, and GPU-Driven pipeline:
✔️ A compute shader is to move data from one buffer to another
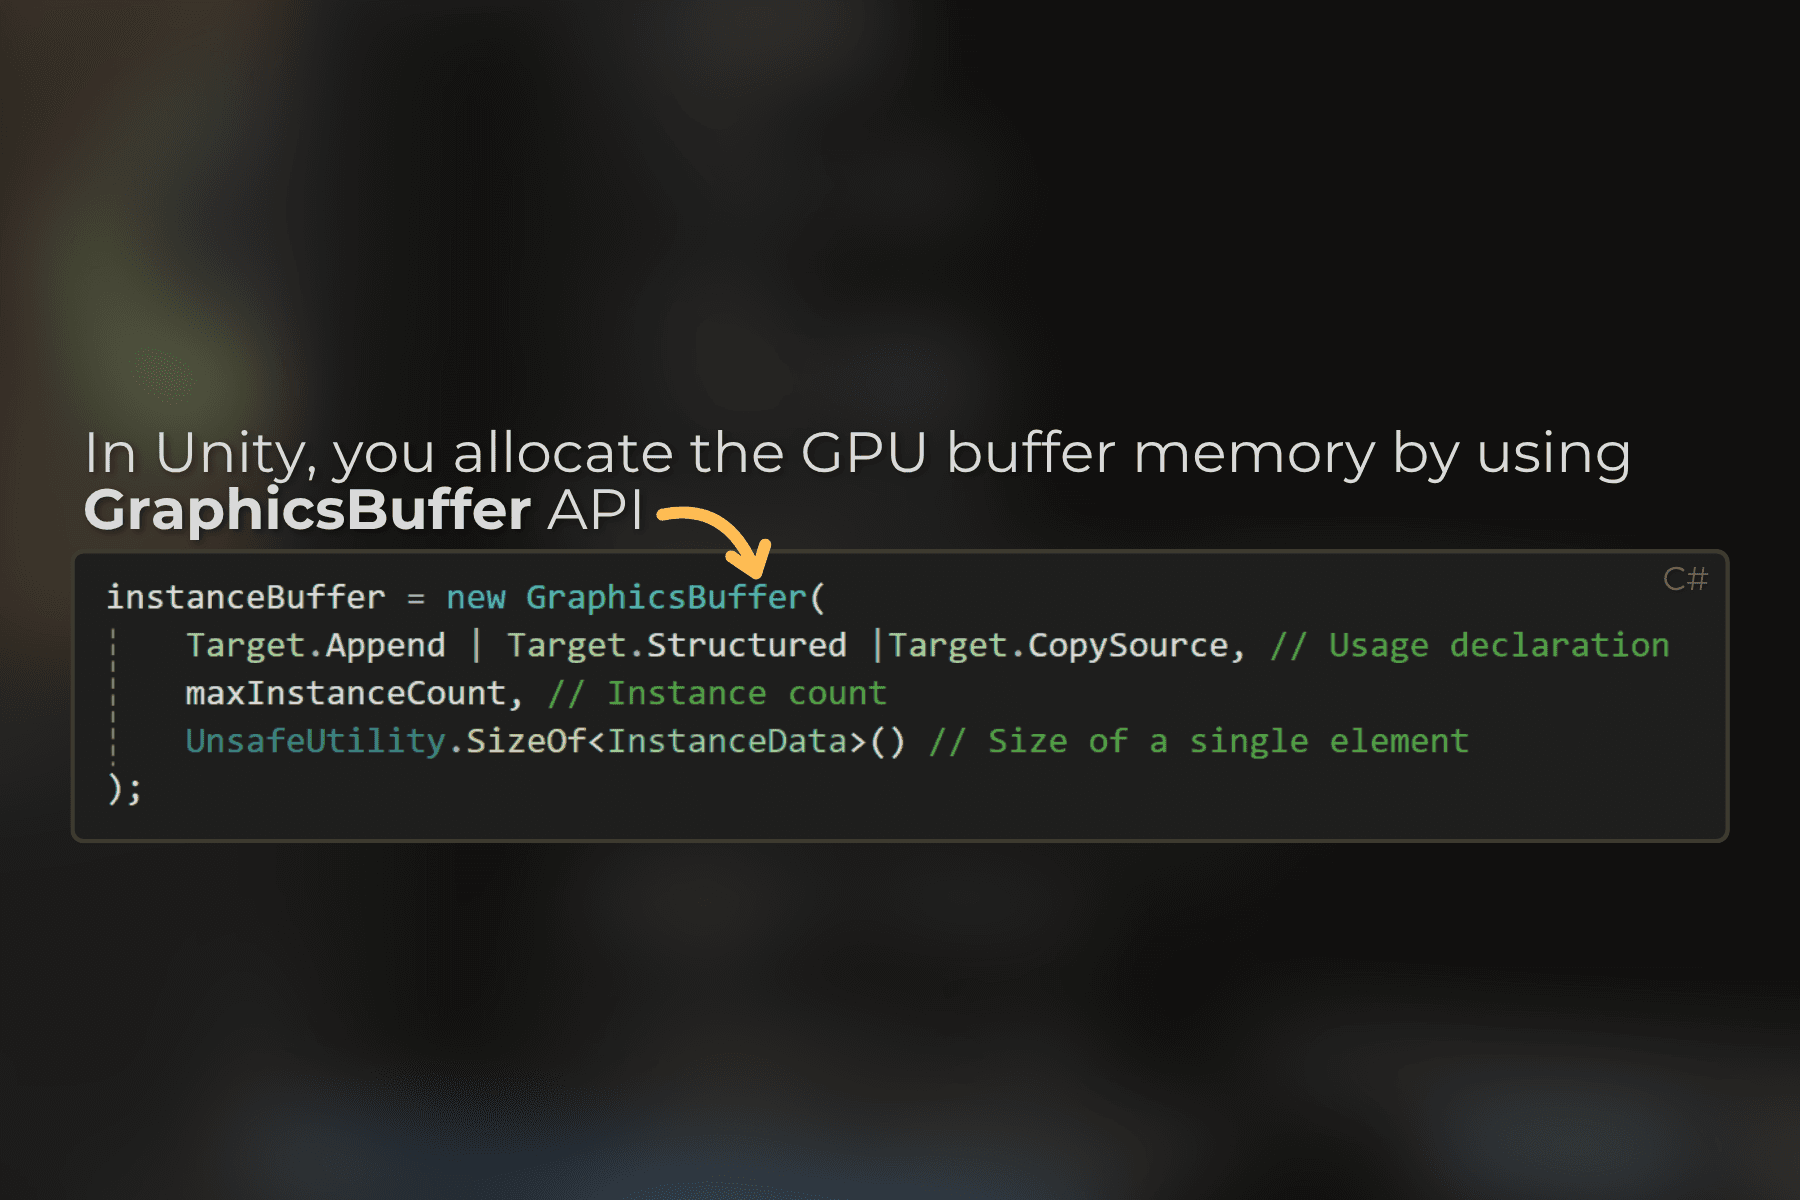
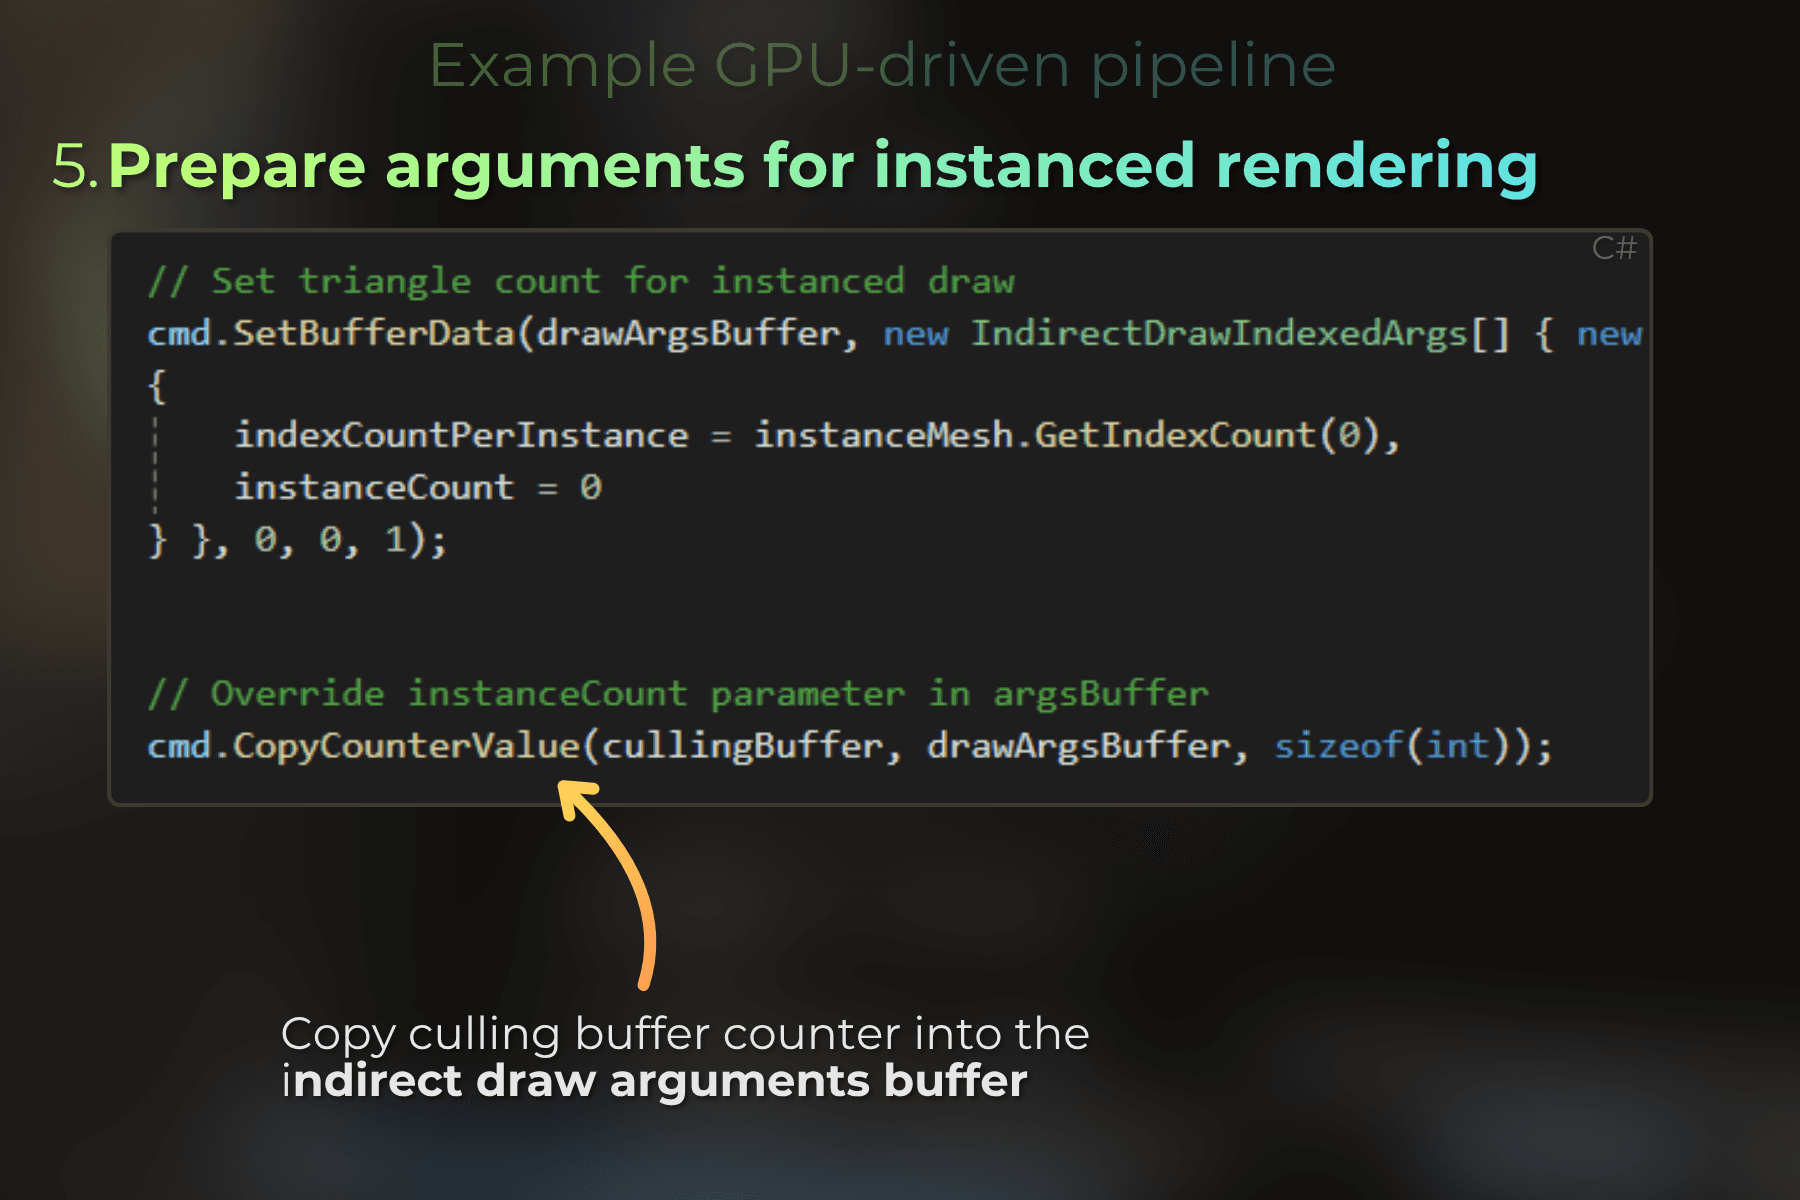
✔️ The CPU is only an orchestrator: it allocates the buffers, dispatches passes, and submits draw calls, but all the draw call preparation happens on the GPU
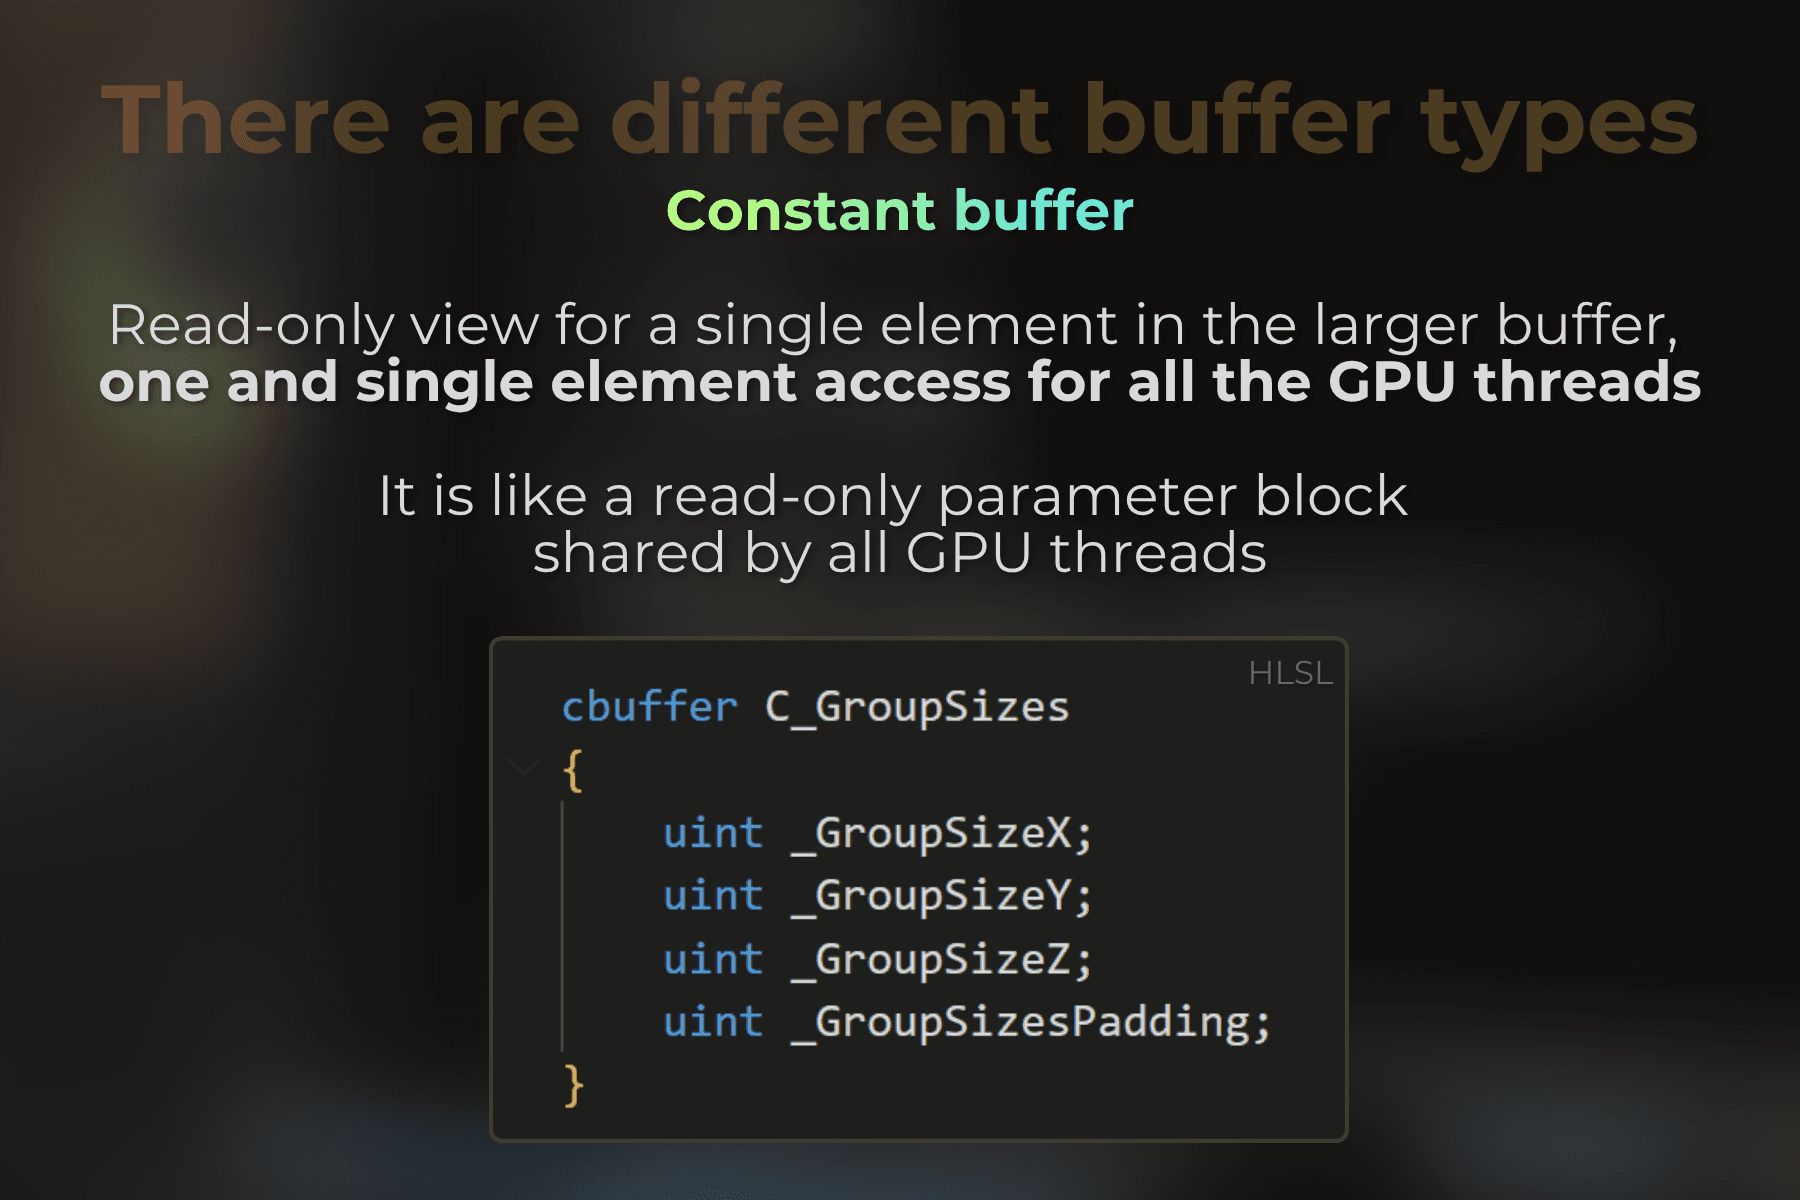
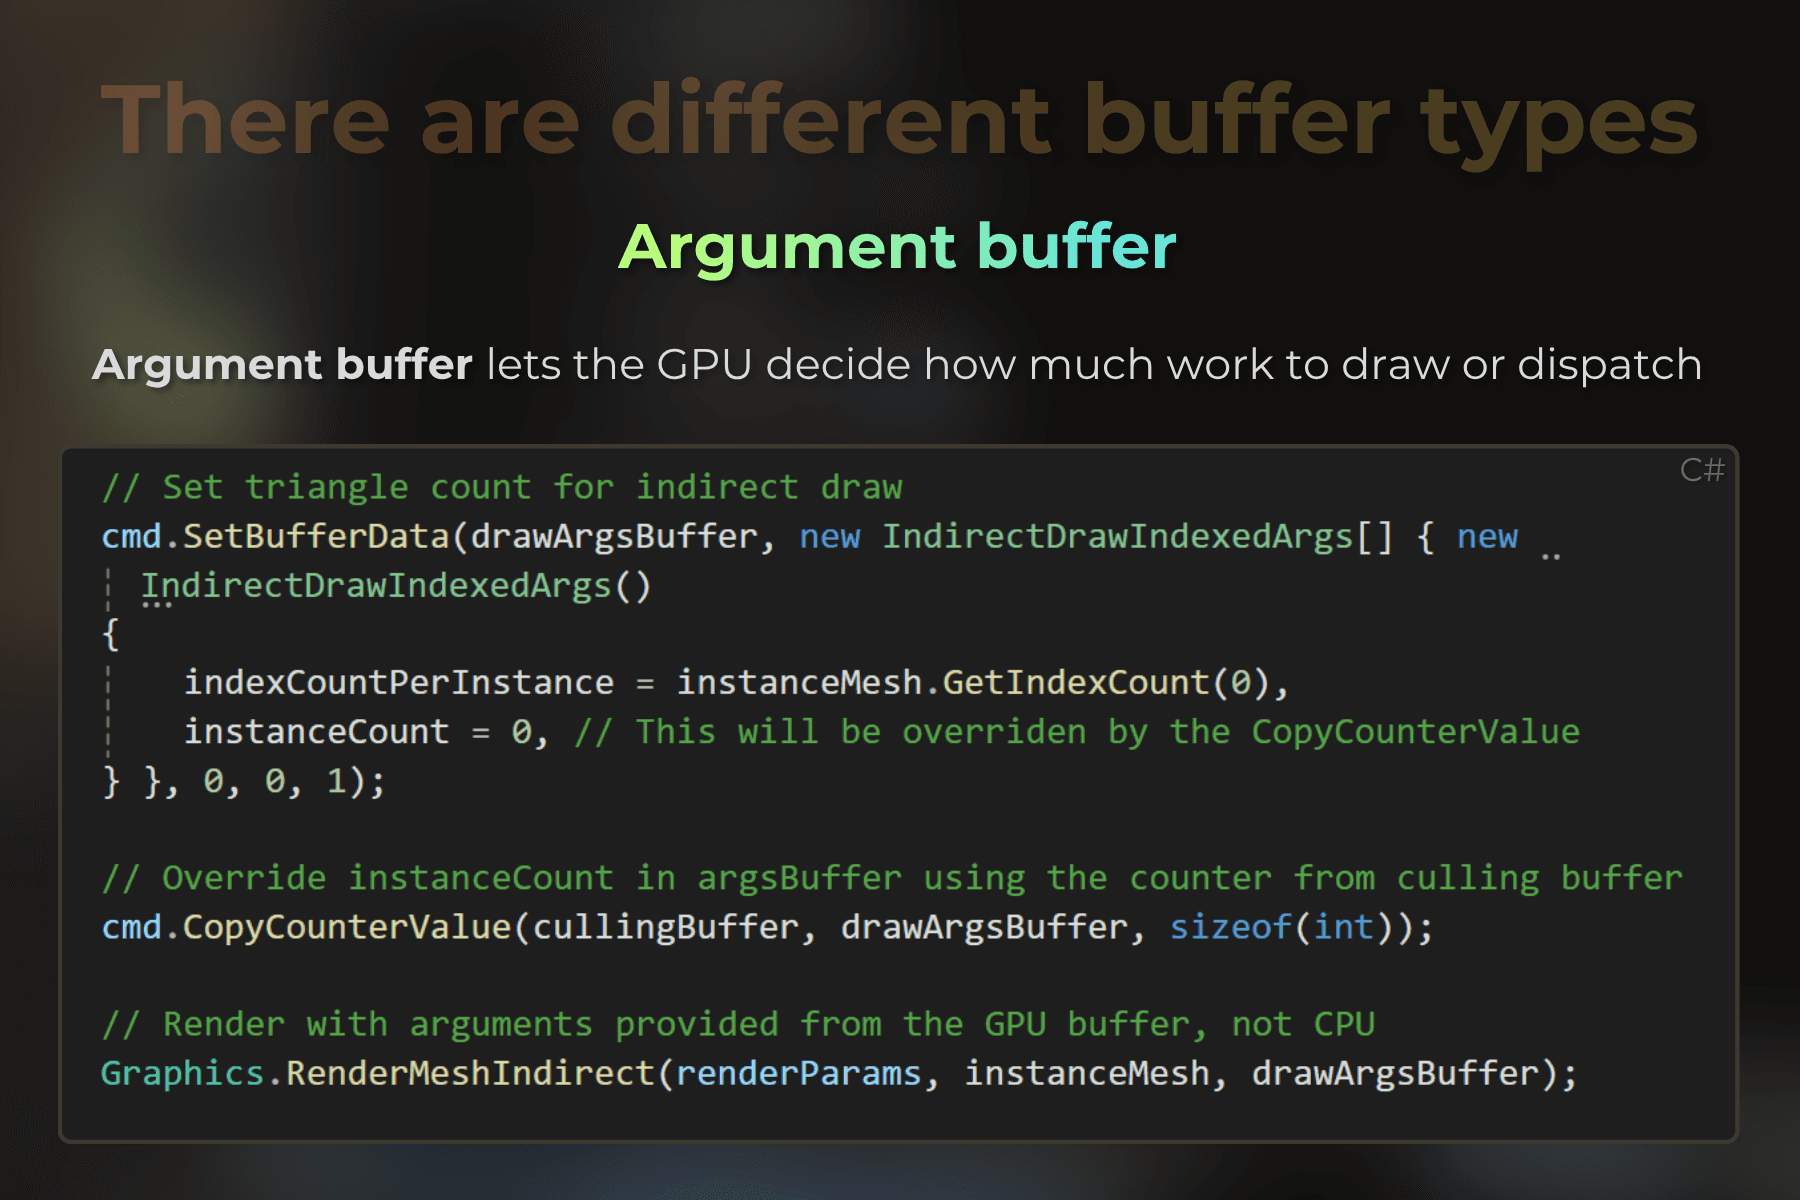
✔️ Append/Consume buffers let GPU threads produce a variable number of results without knowing the final count in advance. Those buffers store the internal counter for the elements.
✔️ You can't access a buffer counter directly in the shader, but you can copy its value into another buffer and use it in the next dispatch or draw arguments
✔️ Preparing indirect arguments on the GPU is what makes it truly GPU-driven: the CPU never reads back any data during the rendering
✔️ In larger projects, GPU-driven rendering is more about establishing a clean data pipeline and buffer layout that each pass can consume
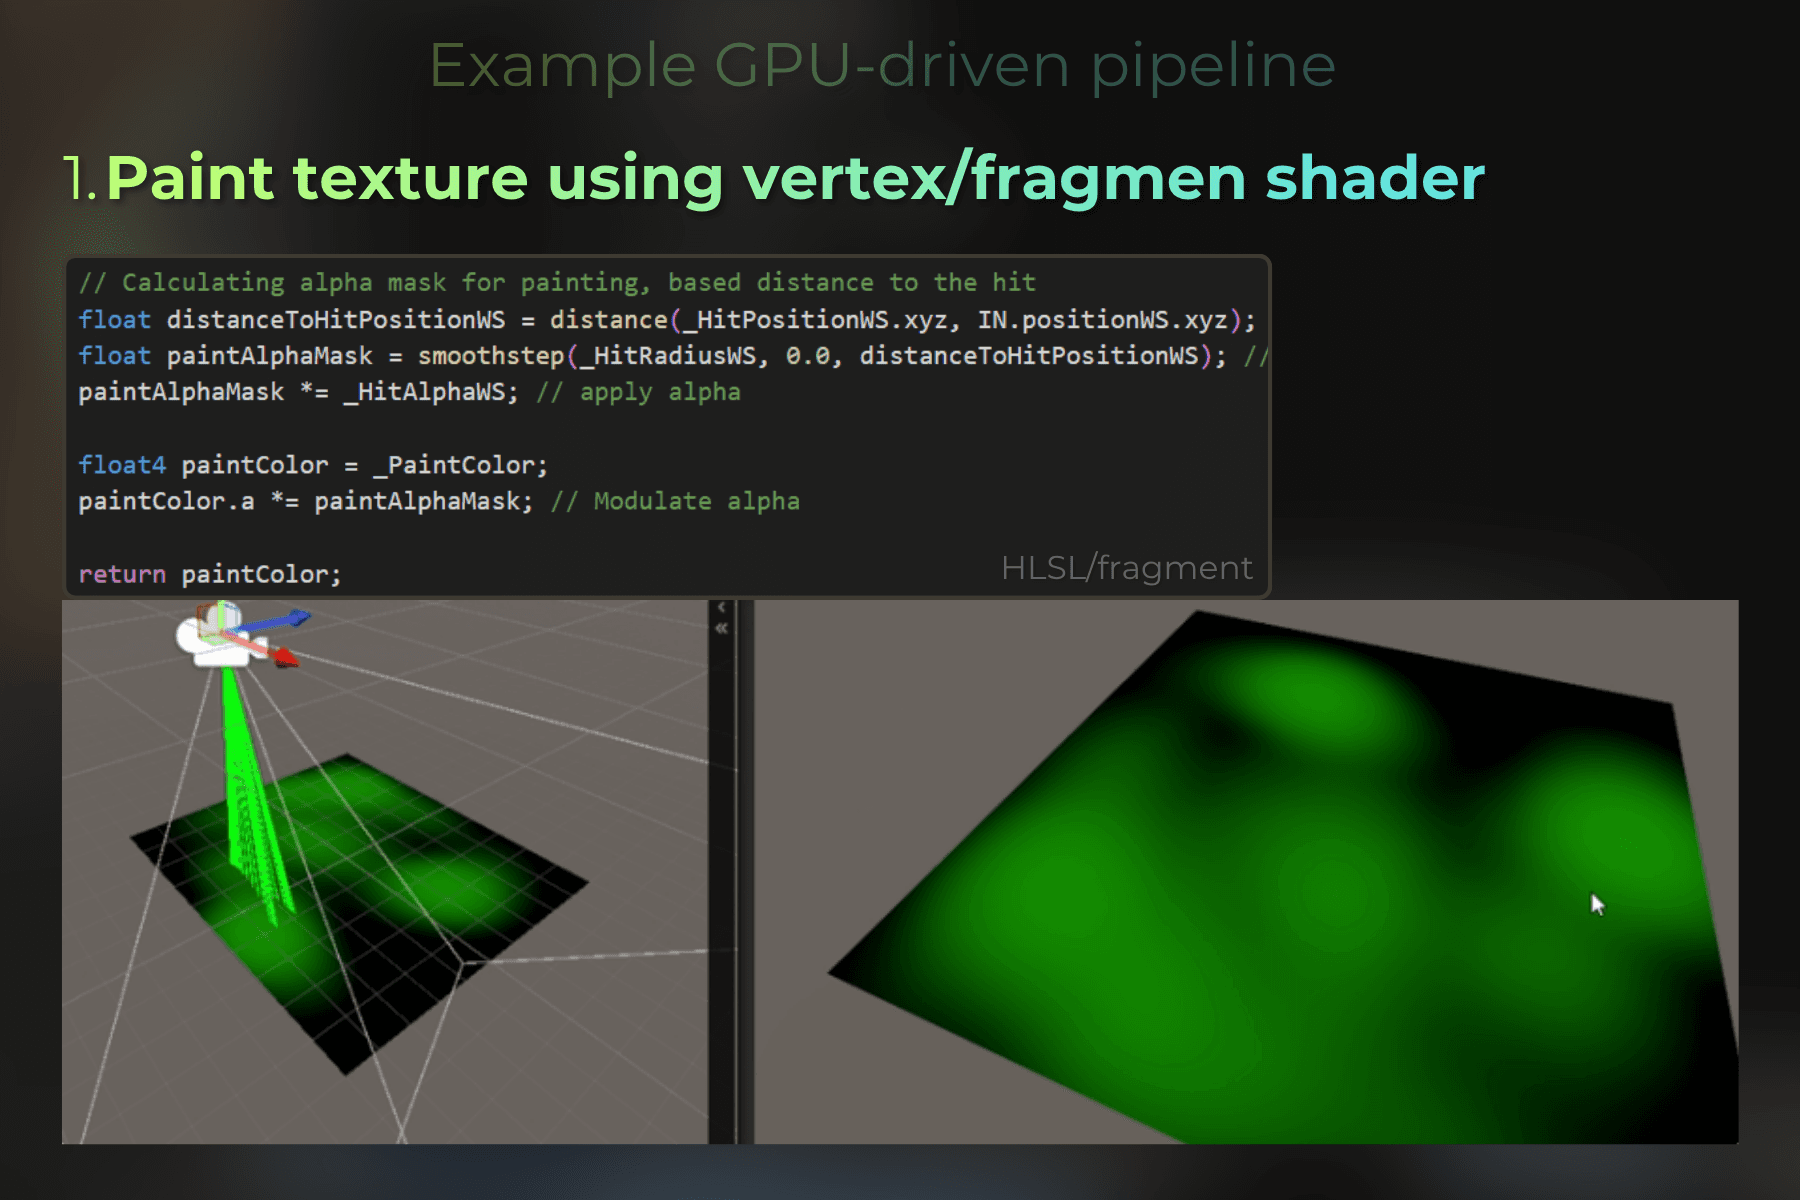
I made the infographics below to quickly explain different buffer types and to introduce you to the world of GPU-driven rendering.